Home Tips & Guide
Category:

Tips & Guide

24

Clean, safe drinking water stands as a fundamental necessity for every household. Yet municipal water supplies can contain various impurities—from harmless minerals that affect taste to concerning contaminants that pose health risks. Home water filtration systems offer an effective solution to these concerns, but navigating the numerous options available can quickly become overwhelming. This comprehensive guide breaks down the different types of water filtration systems, helping homeowners make informed decisions based on their specific needs, water quality issues, and budget constraints.

Understanding Your Water Quality

Before choosing a filtration system, homeowners should first identify the specific contaminants present in their water. This knowledge serves as the foundation for choosing an appropriate solution.

Common Water Contaminants

Different filtration systems target specific contaminants. Here are the most common water quality issues:

Sediment and Particulates

  • Dirt, rust particles, and sand
  • Causes cloudy appearance and gritty texture
  • Generally harmless but unpleasant and can damage appliances

Chemical Contaminants

  • Chlorine and chloramines (water treatment additives)
  • Volatile organic compounds (VOCs)
  • Pesticides and herbicides
  • Industrial chemicals
  • Pharmaceutical residues

Heavy Metals

  • Lead (from old plumbing)
  • Copper, mercury, and arsenic
  • Can cause serious health issues with long-term exposure

Microbiological Contaminants

  • Bacteria and viruses
  • Parasites like Giardia and Cryptosporidium
  • Can cause immediate illness, especially in vulnerable populations

Dissolved Minerals

  • Calcium and magnesium (cause hardness)
  • Iron (causes staining and metallic taste)
  • Sulfur (creates unpleasant “rotten egg” odor)

Testing Your Water

Professional testing offers the most thorough and accurate evaluation of water quality concerns. Options include:

Municipal Water Reports

  • Local water utilities publish annual Consumer Confidence Reports
  • Free and accessible but may not reflect conditions specific to your home
  • Covers regulated contaminants only

Home Testing Kits

  • Available at hardware stores and online
  • Test for common issues like hardness, pH, chlorine, and some metals
  • Affordable but less comprehensive than professional testing

Professional Laboratory Testing

  • Provides detailed analysis of numerous potential contaminants
  • Most accurate and comprehensive option
  • Costs typically range from $100-$300

Water testing reveals exactly which contaminants need addressing, preventing unnecessary treatment expenses and ensuring effective filtration.

Types of Water Filtration Systems

Water filtration systems are available in a variety of types, each offering its own set of benefits and drawbacks. Understanding these differences helps match the right system to specific household needs.

Point-of-Use vs. Whole-House Systems

The first decision involves choosing between systems that filter water at specific locations versus those that treat all water entering the home.

Point-of-Use Systems

  • Filter water at specific locations (typically kitchen sink)
  • Cost-effective for drinking and cooking water
  • Examples include under-sink filters, countertop units, and faucet attachments
  • Ideal for renters or those with limited budgets

Whole-House Systems

  • Filter all water entering the home
  • Protect plumbing, appliances, and fixtures
  • Provide filtered water from every tap
  • Require professional installation
  • Higher initial investment but comprehensive protection

Major Filtration Technologies

Different filtration methods target specific contaminants. Many systems combine multiple technologies for comprehensive protection.

Activated Carbon Filtration

Activated carbon purifies through adsorption, where contaminants adhere to its extensive surface area.

Strengths:

  • Highly effective at eliminating chlorine, VOCs, pesticides, and other harmful chemicals
  • Improves taste, odor, and clarity
  • Relatively affordable
  • Available in various forms (block, granular, etc.)

Limitations:

  • Does not remove dissolved minerals or salts
  • Cannot remove most heavy metals effectively
  • Requires regular filter replacement
  • Not effective against bacteria or viruses

Best For:

  • Improving taste and odor
  • Removing common chemical contaminants
  • Point-of-use applications

Reverse Osmosis (RO) Systems

Reverse osmosis pushes water through a semi-permeable membrane, which blocks contaminants but lets water molecules pass through.

Strengths:

  • Removes up to 99% of dissolved contaminants
  • Effective against heavy metals, salts, and minerals
  • Reduces bacteria and viruses
  • Comprehensive contaminant removal

Limitations:

  • Wastes water
  • Removes beneficial minerals along with contaminants
  • Slow filtration process requires storage tank
  • Requires adequate water pressure to function properly

Best For:

  • Comprehensive water purification
  • Homes with significant contamination concerns
  • Point-of-use applications (typically under-sink)

Ion Exchange Systems

Ion exchange systems replace undesirable charged particles (ions) with more favorable ones.

Strengths:

  • Excellent for water softening (removing calcium and magnesium)
  • Effective against certain heavy metals
  • Long-lasting when properly maintained
  • Treats large water volumes efficiently

Limitations:

  • Limited effectiveness against non-ionic contaminants
  • Adds sodium to water (potential health concern for some people)
  • Requires regular maintenance and regeneration
  • Can be costly to operate

Best For:

  • Hard water treatment
  • Whole-house applications
  • Homes with significant mineral concerns

Ultraviolet (UV) Purification

UV systems use ultraviolet light to destroy the DNA of microorganisms, preventing reproduction.

Strengths:

  • Highly effective against bacteria, viruses, and parasites
  • No chemicals added to water
  • Low operating costs
  • No change to water taste or composition

Limitations:

  • No effect on chemical contaminants, heavy metals, or minerals
  • Requires pre-filtration for turbid water
  • Effectiveness depends on proper maintenance and lamp replacement
  • Requires electricity to operate

Best For:

  • Microbiological contamination concerns
  • Complementing other filtration methods
  • Well water systems prone to bacterial contamination

Sediment Filtration

These mechanical filters remove particles such as dirt, rust, and sand.

Strengths:

  • Removes visible particles and sediment
  • Protects other filtration components
  • Extends appliance lifespan
  • Simple and affordable

Limitations:

  • Only removes physical particles
  • No effect on dissolved contaminants
  • Requires regular replacement depending on water quality
  • Multiple micron ratings available for different needs

Best For:

  • Pre-filtration before other treatment methods
  • Protecting appliances and plumbing
  • Homes with visibly cloudy or particle-filled water

Popular System Configurations

Multiple technologies often combine to create comprehensive filtration solutions.
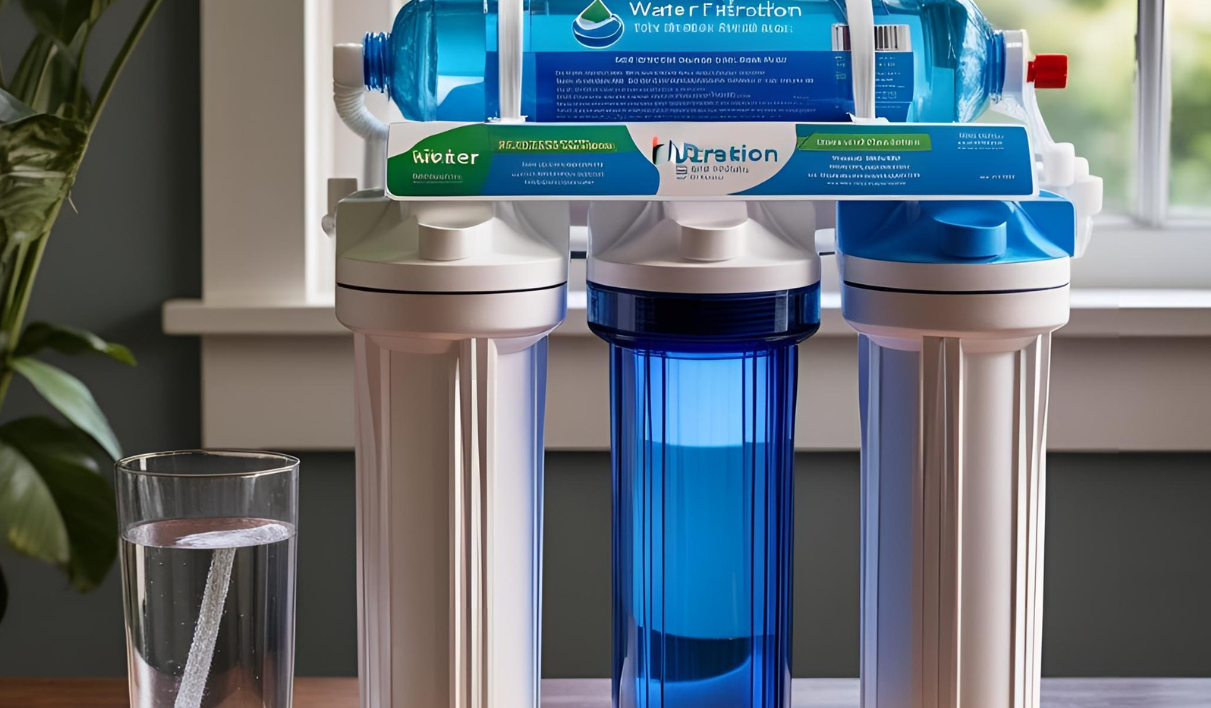
Under-Sink Systems

Installed in the cabinet beneath kitchen or bathroom sinks, these systems provide filtered water through a dedicated faucet.

Common Types:

  • Reverse osmosis systems with multi-stage filtration
  • Carbon block systems
  • Combination systems with sediment, carbon, and specialized media

Advantages:

  • Hidden from view
  • Dedicated dispenser for filtered water
  • Multiple filtration stages possible
  • Moderate installation difficulty

Considerations:

  • Takes up cabinet space
  • May require plumbing modifications
  • Typically filters cold water only

Countertop Filters

These units connect to the existing faucet or stand alone with their own reservoir.

Common Types:

  • Carbon block filters
  • Gravity-fed systems
  • Portable purifiers

Advantages:

  • No permanent installation required
  • Visible filtration process
  • Easy to move or take when relocating
  • No plumbing modifications needed

Considerations:

  • Takes up counter space
  • Limited filtration capacity
  • May not be aesthetically pleasing
  • Often less comprehensive than installed systems

Faucet-Mounted Filters

These small units attach directly to the faucet head.

Common Types:

  • Carbon filters
  • Basic sediment filters

Advantages:

  • Very affordable
  • Simple installation (no tools required)
  • Easy to switch between filtered and unfiltered water
  • Good for renters

Considerations:

  • Limited filtration capability
  • Not compatible with all faucet types
  • Often bulky appearance
  • Frequent filter replacements

Whole-House Systems

These systems treat all water entering the home through the main water line.

Common Types:

  • Multi-stage systems (sediment, carbon, specialized media)
  • Water softeners
  • UV purification systems
  • Combination systems

Advantages:

  • Comprehensive protection for entire home
  • Protects plumbing and appliances
  • Convenience of filtered water everywhere
  • Lower per-gallon treatment cost over time

Considerations:

  • Higher initial investment
  • Professional installation recommended
  • Requires adequate space near main water line
  • May reduce water pressure if improperly sized

Pitcher Filters

Simple water pitchers with built-in filtration cartridges offer basic water improvement.

Common Types:

  • Carbon filters with ion exchange resins
  • Basic sediment and taste/odor improvement

Advantages:

  • Most affordable option
  • No installation required
  • Portable and simple
  • Good starter option

Considerations:

  • Limited capacity
  • Basic filtration only
  • Slow filtering process
  • Frequent replacements needed

Refrigerator Filters

Many modern refrigerators feature built-in filtration for drinking water and ice production.

Common Types:

  • Carbon block filters
  • Combination carbon and sediment filters

Advantages:

  • Convenient integration with refrigerator
  • Chilled filtered water and ice
  • Space-efficient design
  • Usually simple replacement process

Considerations:

  • Limited filtration capacity
  • Manufacturer-specific replacement filters (often expensive)
  • May reduce water flow
  • Less effective than dedicated systems

Selecting the Right System for Your Needs

Choosing the appropriate water filtration system involves balancing several important factors.

Matching Systems to Common Water Problems

Different water issues require specific solutions:

Hard Water (Excess Minerals)

  • Best Solution: Water softener or ion exchange system
  • Alternative: Specialty filter cartridges for point-of-use treatment

Chlorine Taste/Odor

  • Best Solution: Activated carbon filtration
  • System Type: Any carbon-based filter matches this need

Heavy Metals (Lead, Mercury, etc.)

  • Best Solution: Reverse osmosis or specialized media
  • System Type: Under-sink RO or whole-house with proper media

Bacteria and Microorganisms

  • Best Solution: UV purification with pre-filtration
  • System Type: Whole-house UV system or specialized point-of-use purifier

Sediment and Particles

  • Best Solution: Mechanical sediment filtration
  • System Type: Whole-house preferred, often as pre-filter for other systems

Comprehensive Protection

  • Best Solution: Multi-stage system with sediment, carbon, RO, and/or UV components
  • System Type: Whole-house plus point-of-use RO for drinking water

Budget Considerations

Filtration costs can vary significantly depending on the system’s complexity and the area it needs to cover:

Entry-Level Options ($25-$100)

  • Pitcher filters
  • Faucet attachments
  • Basic countertop systems
  • Limited effectiveness but better than no filtration

Mid-Range Options ($100-$500)

  • Quality under-sink carbon systems
  • Basic reverse osmosis systems
  • Simple whole-house sediment filters
  • Good balance of performance and value

High-End Options ($500-$2,500+)

  • Comprehensive multi-stage systems
  • Whole-house reverse osmosis
  • Combined softening and filtration systems
  • Maximum protection and convenience

Ongoing Expenses

  • Filter replacement costs (varies widely by system)
  • Water waste (especially with RO systems)
  • Electricity costs (minimal for UV systems)
  • Maintenance requirements

Installation and Maintenance Requirements

Practical considerations often influence system selection:

DIY-Friendly Options

  • Pitcher filters and countertop units (no installation)
  • Faucet attachments (simple connection)
  • Some under-sink carbon systems (basic plumbing skills)

Professional Installation Recommended

  • Whole-house systems
  • Complex under-sink installations
  • Water softeners and specialized systems
  • Anything requiring electrical connections or significant plumbing modifications

Maintenance Factors

  • Filter replacement frequency (ranges from monthly to yearly)
  • Complexity of replacement process
  • Availability of replacement parts
  • Cleaning requirements

Space Requirements

Available installation space affects system options:

Minimal Space Options

  • Faucet attachments
  • Compact under-sink systems
  • Pitcher filters

Moderate Space Requirements

  • Standard under-sink systems (need cabinet space)
  • Countertop units (need counter space)
  • Small point-of-entry systems

Significant Space Needs

  • Whole-house multi-stage systems
  • Water softeners
  • Combined treatment systems

Special Situations

Certain living situations require particular considerations:

Renters

  • Portable systems preferred (pitchers, countertops)
  • Easily removable installations (faucet attachments)
  • Under-sink systems that can be uninstalled without damage

Well Water Users

  • More extensive testing recommended
  • Often need multi-stage treatment
  • Consideration for varying seasonal water quality
  • May need specialized contaminant removal (arsenic, radon, etc.)

City Water Users

  • Focus on chlorine/chloramine removal
  • Consider lead contamination in older homes
  • May not need bacterial protection

Installation and Maintenance Best Practices

Proper installation and maintenance ensure optimal system performance and longevity.

Installation Tips

Following best practices during installation prevents problems later:

General Guidelines

  • Follow manufacturer instructions precisely
  • Use appropriate tools and materials
  • Install shut-off valves for easier maintenance
  • Consider drain proximity for waste-producing systems
  • Ensure adequate space for filter changes

DIY Considerations

  • Know your limits—complex systems may require professional help
  • Use plumber’s tape on threaded connections
  • Pressure-test connections before finalizing installation
  • Label components for future maintenance

Professional Installation

  • Check credentials and experience
  • Get multiple quotes
  • Ask about warranties and follow-up service
  • Ensure permits if required by local code

Ongoing Maintenance

Regular maintenance preserves system effectiveness:

Replacement Schedules

  • Create calendar reminders for filter changes
  • Replace filters on schedule even if water still seems okay
  • Consider capacity-based replacement for variable usage situations

Performance Monitoring

  • Watch for changes in water pressure
  • Note any taste or odor changes
  • Consider periodic water testing to confirm system effectiveness

System Sanitization

  • Follow manufacturer guidelines for system cleaning
  • Consider annual sanitization for systems with storage tanks
  • Replace all filters when sanitizing the system

Environmental and Health Considerations

Water filtration choices impact both health and environmental footprints.

Environmental Impact

Water treatment systems affect the environment in several ways:

Water Waste

  • Reverse osmosis typically wastes 3-4 gallons per gallon produced
  • Some systems offer water-saving technology or waste water recycling
  • Higher efficiency units may cost more initially but save resources

Filter Disposal

  • Most filters end up in landfills
  • Some manufacturers offer recycling programs
  • Filter lifetime affects overall waste generation

Energy Usage

  • Most passive filters use no energy
  • UV systems require constant electricity
  • Softeners need power for regeneration cycles

Health Implications

Filtration affects water’s health properties:

Mineral Removal

  • Some systems (especially RO) remove beneficial minerals
  • Remineralization filters can restore healthy mineral content
  • Consideration for dietary mineral intake from other sources

Sodium Addition

  • Water softeners add sodium to water
  • Potential concern for those on sodium-restricted diets
  • Potassium-based alternatives available but more expensive

Bacterial Growth

  • Without proper upkeep, storage tank systems can turn into breeding grounds for bacteria.
  • If carbon filters are not replaced regularly, they can become a habitat for bacteria and other harmful contaminants
  • UV systems require pre-filtration to work effectively against microorganisms

Making Your Final Decision

With so many options available, a systematic approach helps find the best system.

Step-by-Step Selection Process

  1. Test your water to identify specific contaminants
  2. Prioritize contaminants based on health risks and aesthetic concerns
  3. Set a realistic budget for the initial purchase as well as ongoing maintenance costs.
  4. Evaluate installation requirements against your DIY skills or professional help availability
  5. Consider space limitations in your home
  6. Research specific models that meet your identified needs
  7. Read user reviews for real-world performance feedback
  8. Check warranty coverage and company reputation
  9. Make your selection based on this comprehensive evaluation

Questions to Ask Before Purchasing

  • What specific contaminants does this system remove?
  • What is the system’s flow rate and daily capacity?
  • How often do filters need replacement and what do they cost?
  • What is the total cost of ownership over five years?
  • Does installation require a professional?
  • What kind of warranty covers the system?
  • Is the manufacturer established and reliable?
  • How easy is filter replacement for someone with limited technical skills?

Conclusion

Clean, healthy water represents one of the most important investments in home health and comfort. The right filtration system provides peace of mind, improved taste, and protection from potential contaminants. By understanding water quality issues, evaluating the different technologies available, and considering practical factors like budget and installation requirements, homeowners can select systems that perfectly match their needs. Remember that water quality varies widely between locations and can change over time. Periodic reassessment ensures continued protection as conditions evolve. Whether choosing a simple pitcher filter or investing in a comprehensive whole-house system, any step toward water quality improvement benefits both health and quality of life. The perfect system balances effective contaminant removal with practical considerations, creating a sustainable solution for years of clean, safe water.

Finding the perfect running shoes can make all the difference between an enjoyable run and painful injuries. The right shoes provide proper support, enhance performance, and prevent common running problems. Many runners make the mistake of choosing shoes based solely on brand reputation or appearance. A better approach focuses on matching footwear to your unique foot type and running style. This comprehensive guide explains how to select running shoes that work harmoniously with your body.

Understanding Foot Types

All feet typically fall into one of three main types. Knowing your foot type is the first crucial step toward finding your ideal running shoes.

Neutral Feet

Neutral feet have a moderate arch that compresses slightly when bearing weight. These feet typically land with a balanced impact distribution. About 50% of runners have neutral feet.

Key characteristics:

  • Medium arch height
  • Even weight distribution across the foot
  • Footprint shows a moderate curve along the instep
  • Normal pronation

Neutral feet are the most versatile and usually experience fewer running-related problems when properly supported.

Flat Feet (Overpronation)

Flat feet are characterized by having little to no visible arch in the foot. When standing or bearing weight, the entire foot makes contact with the ground. This foot type tends to roll excessively inward (overpronate) during the running gait cycle.

Key characteristics:

  • Low or absent arch
  • Footprint appears nearly complete with little to no curve
  • Feet may roll inward noticeably when running
  • Weight tends to concentrate on the inner edge of the foot

Without proper support, flat feet can lead to issues like shin splints, knee pain, and plantar fasciitis.

High-Arched Feet (Supination)

High-arched feet have pronounced, rigid arches that don’t flatten much when bearing weight. This structure often leads to underpronation or supination, where the foot doesn’t roll inward enough during the gait cycle.

Key characteristics:

  • Distinct, high arch that remains elevated when standing
  • Footprint shows a dramatic curve with minimal midfoot contact
  • The foot tends to roll outward when running
  • Weight concentrates on the outer edge of the foot

High arches provide less natural shock absorption, potentially causing stress fractures, ankle strains, and outer knee issues.

Determining Your Foot Type

Here are a few easy ways to determine your foot type. Try these approaches at home.

The Wet Test

This simple visual test reveals your foot arch type:

  1. Fill a shallow pan with water
  2. Step into the pan, allowing the bottom of your foot to get wet
  3. Step onto a clean sheet of paper or a paper shopping bag
  4. Examine the footprint shape

A complete footprint with little curve indicates flat feet. A footprint with a severe narrowing in the middle suggests high arches. A footprint with slight narrowing suggests neutral feet.

Shoe Wear Pattern

Check the bottoms of well-worn running shoes:

  • Even wear across the ball of the foot and a small portion of the heel indicates neutral feet
  • Wear concentrated on the inner edges indicates overpronation

Wear mostly on the outer edges indicates supination.

Professional Gait Analysis

Many specialty running stores offer free gait analysis. The staff watches you walk or run, sometimes using treadmills with video recording. This professional assessment provides valuable insights beyond simple foot type, capturing dynamic movement patterns.

Running Shoe Categories

Modern running shoes generally fall into four main categories designed for different foot types and pronation patterns.

Neutral Shoes

Best for: Neutral feet with normal pronation or slightly high-arched feet

Neutral shoes provide balanced cushioning without attempting to correct your running form. These versatile shoes offer flexibility and moderate support.

Key features:

  • Medium arch support
  • Balanced cushioning throughout
  • Flexible construction
  • Smooth transition from heel to toe

Many runners with neutral mechanics find these shoes comfortable for daily training, long distances, and recovery runs.

Stability Shoes

Best for: Mild to moderate overpronation or neutral runners wanting extra support

Stability shoes incorporate technologies that help control excessive inward foot rolling. These shoes strike a balance between motion control and comfort.

Key features:

  • Firmer midsole material on the inner (medial) side
  • Structured arch support
  • Moderate pronation control
  • Semi-rigid heel counter

Stability shoes remain the most popular category, working well for many runners with average builds and mild biomechanical issues.

Motion Control Shoes

Best for: Severe overpronation or heavier runners with flat feet

Motion control shoes provide maximum pronation control for runners who need significant correction. These shoes prioritize support and stability over flexibility.

Key features:

  • Very firm support in the midsole
  • Rigid heel construction
  • Maximum pronation control
  • Straight last (shape) design
  • Heavy-duty construction

While less flexible than other options, these shoes deliver essential support for runners who need substantial correction.

Cushioned Shoes

Best for: High arches, supination, or runners prioritizing impact protection

Cushioned shoes focus on shock absorption and impact protection rather than pronation control. The extra padding helps compensate for the limited natural shock absorption of high arches.

Key features:

  • Maximum cushioning throughout the midsole
  • Flexible construction
  • Limited structural support elements
  • Curved last design

These shoes work particularly well for runners with rigid, high arches who need help dissipating impact forces.

Key Shoe Components and Technologies

Understanding shoe construction helps make informed decisions when comparing models.

Midsole

The midsole plays a crucial role in offering cushioning and support within the shoe. Different materials offer varying combinations of softness, responsiveness, durability, and weight.

Common midsole materials:

  • EVA (Ethylene Vinyl Acetate): Lightweight, cushioned, but less durable
  • PEBA (Polyether Block Amide): Extremely lightweight with superior energy return
  • TPU (Thermoplastic Polyurethane): More durable with consistent performance in various temperatures
  • Carbon fiber plates: Rigid inserts that enhance propulsion and efficiency

Proprietary foams like Nike’s ZoomX, Adidas Boost, Brooks DNA, and Hoka’s CMEVA each provide unique performance characteristics.

Upper

The upper wraps the foot and affects comfort, breathability, and fit security.

Upper considerations:

  • Engineered mesh provides ventilation and flexibility
  • Gusseted tongues prevent sliding and irritation
  • Heel collars should grip securely without causing blisters
  • Toe boxes need adequate width for natural toe splay during push-off

Ensure a seamless construction to minimize friction points that could lead to blisters.

Outsole

The outsole contacts the ground, providing improved traction and durability.

Outsole features:

  • Carbon rubber offers superior durability for heel strikers
  • Blown rubber provides better cushioning and flexibility in forefoot areas
  • Lug patterns vary based on intended running surfaces
  • Flex grooves allow the shoe to bend naturally, following the movement of the foot.

Road shoes typically have flatter outsoles, while trail shoes incorporate aggressive lugs for off-road traction.

Heel-to-Toe Drop

This measurement indicates the height difference between the heel and the forefoot of the shoe.

Typical ranges:

  • Traditional drop: 8-12mm encourages heel striking
  • Medium drop: 4-8mm works for midfoot strikers
  • Minimal drop: 0-4mm promotes forefoot striking

Higher drops reduce Achilles tendon strain but may encourage heel striking. Lower drops promote midfoot or forefoot landing but require stronger calf muscles and Achilles tendons.

Special Considerations for Different Foot Types

Each foot type benefits from specific shoe features beyond the general categories.

For Neutral Feet

Neutral runners enjoy the most flexibility in shoe selection. Focus on comfort and specific training needs rather than correction features.

Recommendations:

  • Try neutral shoes first
  • Moderate cushioning usually provides adequate protection
  • Select based on intended use (speed work vs. long runs)
  • Consider medium heel-to-toe drops (4-8mm)

Even with neutral mechanics, rotating between different shoes can help prevent overuse injuries by varying stress patterns.

For Flat Feet

Runners with flat feet need support to control excess motion and prevent related injuries.

Recommendations:

  • Start with stability shoes for mild overpronation
  • Consider motion control shoes for severe overpronation
  • Look for visible medial posts or dual-density midsoles
  • Choose models with reinforced heel counters
  • Avoid minimalist shoes without significant support

Some flat-footed runners benefit from custom orthotic inserts that work alongside their shoes’ built-in support systems.

For High Arches

Runners with high arches require extra cushioning to make up for the reduced natural shock absorption.

Recommendations:

  • Prioritize cushioned neutral shoes
  • Look for flexible construction that allows natural foot movement
  • Consider models with cushioned midsoles throughout
  • Ensure adequate room in the toe box
  • Replace shoes more frequently as high-impact patterns wear cushioning faster

Some high-arched runners benefit from aftermarket insoles that provide better arch contact without attempting to correct natural mechanics.

Fitting Tips for All Foot Types

Even the perfect shoe category won’t work if the fit isn’t right. Follow these guidelines when trying on running shoes.

Timing Matters

Shop for shoes later in the day when feet are naturally slightly swollen, similar to how they’ll be during runs.

Bring Your Gear

Wear the socks you’ll actually run in and bring any orthotics or inserts you use.

Size Up

Most runners require shoes that are about half a size larger than their regular footwear. There should be approximately a thumb’s width of space between the longest toe and the front of the shoe.

Test Properly

Walk, jog in place, or use the store’s treadmill if available. Many specialty stores allow short outdoor test runs.

Check Width

The shoe should feel snug but not tight across the widest part of the foot. Look for models offering multiple width options if needed.

Trust Comfort

While technical matching matters, immediate comfort remains crucial. A shoe that feels uncomfortable in the store won’t improve on the run.

When to Replace Running Shoes

Even perfect running shoes don’t last forever. Most models provide optimal protection for 300-500 miles, though heavier runners or those with problematic biomechanics might need replacement sooner.

Signs it’s time for new shoes:

  • Visible midsole wrinkles or compression
  • Uneven outsole wear patterns
  • Diminished cushioning feel
  • Upper material stretching or tearing
  • New aches and pains without training changes

Many dedicated runners rotate between multiple pairs to extend shoe life and vary stress patterns on their feet.

Beyond Basic Matching

While selecting shoes based on foot type provides a strong foundation, personal factors also play a key role in determining the ideal shoe choice.

Running Surface

Trail running demands different features than road running. Trails require more aggressive traction, rock protection plates, and often more stable platforms.

Training Type

Speed workouts benefit from lighter, more responsive shoes, while long-distance training typically requires more cushioning for sustained comfort.

Body Weight

Heavier runners generally need more substantial cushioning and support regardless of arch type. Lightweight runners may prefer better ground contact and enhanced responsiveness.

Running Experience

Newer runners often benefit from more protective, supportive shoes until running-specific muscles develop. Experienced runners may gradually transition to less structured options as their form improves.

Conclusion

Finding the perfect running shoes requires understanding your unique foot type and running mechanics. The process takes some initial effort but pays enormous dividends in comfort, performance, and injury prevention. Start with identifying your foot type, explore shoes in the appropriate category, and prioritize proper fit above all else. Remember that needs may change over time with fitness improvements, age, weight changes, or injury history. Regular reassessment ensures ongoing protection for enjoyable, sustainable running. The perfect shoes won’t make anyone an elite runner overnight, but the wrong shoes can certainly prevent reaching full potential and enjoyment. Take the time to find footwear that works with your body’s natural mechanics, then focus on the miles ahead rather than the discomfort below.

Indoor air quality affects health, comfort, and wellbeing. Many people turn to air purifiers hoping to breathe cleaner air at home. But do these devices actually work? This article examines the evidence behind air purifiers and helps determine if they’re worth the investment.

Modern homes often contain surprising levels of pollutants. From dust and pet dander to volatile organic compounds (VOCs) and airborne pathogens, indoor air can be 2-5 times more polluted than outdoor air, according to EPA studies. Air purifiers promise to address these concerns, but their effectiveness varies widely.

How Air Purifiers Work

Air purifiers use different technologies to remove airborne contaminants. Understanding these mechanisms helps evaluate their actual benefits.

HEPA Filtration

High-Efficiency Particulate Air (HEPA) filters form the core of most quality air purifiers.

How it works: HEPA filters capture particles using a tightly woven mesh of fibers arranged randomly. As air flows through, particles are trapped by various mechanisms:

  • Direct interception of larger particles
  • Inertial impaction when particles can’t follow airflow around fibers
  • Diffusion capturing smaller particles that bounce into fibers

True HEPA filters are designed to remove 99.97% of particles that are 0.3 microns in diameter, which is the most challenging size to capture. They’re even more effective at trapping both larger and smaller particles.

HEPA filtration effectively removes:

  • Dust and dust mites
  • Pollen
  • Pet dander
  • Mold spores
  • Bacteria (most types)
  • Some viruses (depending on size)

HEPA filters cannot capture gases, odors, or VOCs.

Activated Carbon Filtration

Activated carbon complements HEPA technology by capturing particles and gases that HEPA filters may miss.

How it works: Activated carbon has been treated to create millions of microscopic pores, creating a massive surface area. This porous structure adsorbs (binds) gaseous pollutants as they pass through.

Activated carbon effectively removes:

  • Cooking odors
  • Pet odors
  • Volatile organic compounds (VOCs)
  • Smoke particles
  • Some chemicals and gases

The effectiveness depends on the amount of carbon used. Many budget purifiers contain minimal carbon, limiting their ability to remove gases and odors.

Ionization and Electrostatic Precipitation

These technologies use electrical charges to remove particles.

How it works: Ionizers release negatively charged ions that attach to airborne particles. The charged particles then stick to nearby surfaces (walls, furniture) or to collection plates within the purifier.

Electrostatic precipitators function in a similar way, but they specifically aim to attract charged particles to collection plates within the device.

These technologies can capture very small particles but have significant drawbacks:

  • May produce ozone, a lung irritant
  • Require regular cleaning of collection plates
  • Result in particles deposited on room surfaces
  • Generally less effective than HEPA filtration

UV Light

Some purifiers incorporate ultraviolet light to kill microorganisms.

How it works: UV-C light damages the DNA of bacteria, viruses, and other pathogens, preventing them from reproducing. This technology typically complements particle filtration rather than replacing it.

Effectiveness depends on:

  • UV light intensity
  • Exposure time (how long the air remains in the UV chamber)
  • Airflow rate through the purifier

Most residential UV purifiers provide insufficient exposure time for significant pathogen reduction unless airflow is very slow.

Photocatalytic Oxidation (PCO)

This newer technology aims to actively break down pollutants.

How it works: PCO uses UV light with a catalyst (usually titanium dioxide) to create hydroxyl radicals that break down gaseous pollutants and VOCs into harmless compounds.

PCO technology shows promise but has limitations:

  • May produce byproducts including formaldehyde and ozone
  • Limited research on long-term effectiveness
  • Works slowly compared to other technologies

Scientific Evidence: What Research Shows

Multiple scientific studies have evaluated air purifier performance in real-world settings. The evidence supports some benefits while highlighting important limitations.

Particulate Reduction

Strong evidence shows HEPA air purifiers significantly reduce airborne particulate matter:

  • A 2018 study in the Journal of Exposure Science & Environmental Epidemiology found HEPA purifiers reduced indoor PM2.5 (fine particles) by 29-62% in urban homes
  • Research published in Environmental Health Perspectives demonstrated 40-72% reduction in indoor allergen concentrations

However, numerous factors affect performance:

  • Room size relative to purifier capacity
  • Air exchange rates
  • Ongoing sources of pollutants
  • Purifier placement

Allergy and Asthma Symptom Improvement

Clinical research has found measurable health benefits for allergy and asthma sufferers:

  • A double-blind study published in the Journal of Allergy and Clinical Immunology found significant symptom reduction in cat-allergic patients using HEPA purifiers
  • Research in pediatrics has shown that children using bedroom air purifiers experience a reduction in asthma symptoms and a decrease in medication use.

Benefits appear strongest when:

  • Purifiers run continuously
  • Used in bedrooms where people spend 6-8 hours daily
  • Combined with other environmental interventions (regular cleaning, allergen-proof bedding)

VOC and Gas Reduction

Evidence for VOC removal is more limited:

  • Studies show activated carbon filters remove many VOCs initially
  • Effectiveness decreases as carbon becomes saturated
  • Most home purifiers contain insufficient carbon for long-term VOC control
  • Continuous sources of VOCs overwhelm filtration capacity

Research suggests substantial carbon filters (5+ pounds) provide meaningful gas filtration for 3-6 months before requiring replacement.

Infection Risk Reduction

Limited evidence exists regarding infection prevention:

  • Laboratory studies have confirmed that HEPA filtration is effective in removing bacteria and viruses from the air
  • Real-world studies show mixed results regarding infection rate reduction
  • A Harvard study during COVID-19 found properly sized HEPA filtration reduced airborne viral particles by 90+% in controlled settings

Air purifiers represent one tool for infection control but work best combined with other measures.

Factors Affecting Real-World Performance

Several factors determine whether an air purifier delivers on its promises:

Clean Air Delivery Rate (CADR)

CADR measures an air purifier’s filtration speed and efficiency. Higher numbers indicate faster cleaning. Ratings typically cover:

  • Dust (larger particles)
  • Pollen (medium-sized particles)
  • Smoke (smaller particles)

For effective purification, the CADR should match the room size. A general guideline is that the CADR should be at least two-thirds of the room’s square footage.

Air Changes Per Hour (ACH)

ACH indicates the number of times the air purifier can filter the entire volume of the room’s air each hour. Higher numbers mean more frequent filtration.

For allergies and asthma, experts recommend:

  • Minimum 4 ACH for moderate improvement
  • 6+ ACH for significant improvement

Many manufacturers calculate ACH based on ideal conditions. Actual performance may be lower in real homes.

Room Characteristics

Physical spaces impact purifier effectiveness:

  • Higher ceilings require more powerful units
  • Open floor plans dilute purification effects
  • Airflow barriers (furniture, curtains) create dead zones
  • Multiple doorways allow pollutant reintroduction

Closed rooms with minimal disruption show the most measurable air quality improvement.

Proper Sizing

Undersized purifiers provide minimal benefit. For effective filtration:

  • Calculate room square footage accurately
  • Choose a purifier rated for at least 20% more area than needed
  • Account for ceiling height beyond standard 8 feet
  • Consider higher capacity for severe allergies or pollution concerns

Using one right-sized purifier works better than multiple undersized units.

Maintenance Requirements

Air purifiers require regular maintenance:

  • HEPA filters typically need replacement every 6-12 months
  • Carbon filters saturate faster, often requiring replacement every 3-6 months
  • Washable pre-filters need cleaning every 2-4 weeks
  • Collection plates in electronic purifiers require frequent cleaning

Neglecting maintenance significantly hampers performance as filters become clogged and less efficient.

Limitations and Misconceptions

Understanding what air purifiers cannot do helps set realistic expectations:

Cannot Remove All Pollutants

Air purifiers primarily address airborne contaminants. They provide minimal benefit against:

  • Dust mites living in bedding and furniture
  • Allergens embedded in carpets and upholstery
  • Mold growing on surfaces
  • VOCs continuously emitted from furnishings and building materials

Regular cleaning remains essential even with an air purifier.

Cannot Compensate for Poor Ventilation

Air purifiers recirculate and filter existing air. They cannot:

  • Introduce fresh oxygen
  • Remove carbon dioxide buildup
  • Substitute for proper ventilation
  • Resolve structural moisture or humidity issues

Healthy homes require both filtration and adequate fresh air exchange.

Zone Purification vs. Whole-Home Approach

M Most portable air purifiers effectively clean only a single room.  Moving throughout the home means exposure to different air quality levels. Consider:

  • Prioritizing bedrooms where people spend most time
  • Using different purifier types based on each room’s specific concerns
  • Understanding that doorways and normal movement limit any room’s isolation

Using multiple units or a whole-home system ensures more even and consistent air quality across the entire living space.

Choosing the Right Air Purifier

With numerous options available, focus on these factors when selecting an air purifier:

For Allergies and Asthma

Prioritize:

  • True HEPA filtration (not “HEPA-like” or “HEPA-type”)
  • Appropriate CADR for room size
  • Quiet operation on medium settings
  • Long-term filter availability
  • Minimal or no ionization

Avoid extra features like UV or PCO that increase cost without significantly improving allergen removal.

For Chemical Sensitivity and Odors

Look for:

  • Substantial activated carbon filtration
  • Low or no plastic components that off-gas
  • No fragrance features
  • Sealed filter design preventing air bypass
  • Multi-stage filtration including HEPA and specialized chemical adsorbents

Units specifically designed for chemical sensitivity typically cost more but provide significantly better gas filtration.

For General Air Quality Improvement

Balance features and budget:

  • True HEPA filtration
  • Moderate carbon filtration
  • Energy efficiency (ENERGY STAR certification)
  • Filter replacement indicators
  • Multiple fan speeds
  • Reasonable noise levels

Mid-range units ($200-350) typically offer the best value for general use.

Red Flags and Features to Avoid

Be cautious about:

  • Ozone generators marketed as purifiers (dangerous to lung health)
  • Very low-cost units claiming HEPA filtration below $100
  • Excessive features unrelated to filtration
  • Proprietary filter designs with expensive replacements
  • Units with no third-party testing or certification

Marketing terms like “99% pure air” have no standardized meaning and may indicate exaggerated claims.

Cost Considerations

Air purifiers involve both initial and ongoing expenses:

Purchase Price

Quality air purifiers typically cost:

  • Small room units: $100-200
  • Medium room units: $200-350
  • Large room units: $350-700
  • Premium units: $700-1000+

Budget options under $100 generally offer minimal effective filtration.

Replacement Filters

Annual filter costs range from:

  • Basic HEPA: $30-60 annually
  • HEPA plus carbon: $60-120 annually
  • Premium multi-stage: $100-200 annually

Some manufacturers require filter subscriptions or proprietary replacements, increasing long-term costs.

Electricity Usage

Operating costs vary significantly:

  • Basic units: $30-50 annually
  • Mid-range units: $50-100 annually
  • High-power units: $100-200+ annually

Energy-efficient models with programmable timers and air quality sensors reduce electricity consumption by running only when needed.

Beyond Air Purifiers: Comprehensive Indoor Air Quality

Air purifiers work best as part of a broader strategy:

Source Control

Eliminating pollution sources provides greater benefit than filtering:

  • Use low-VOC paints and furnishings
  • Avoid air fresheners and scented products
  • Address water leaks and moisture issues promptly
  • Choose hard flooring over carpeting when possible
  • Maintain combustion appliances properly

No purifier compensates for ongoing pollution sources.

Ventilation Improvements

Increasing fresh air exchange naturally improves air quality:

  • Use exhaust fans in kitchens and bathrooms
  • Open windows when outdoor air quality permits
  • Consider mechanical ventilation systems like ERVs or HRVs
  • Ensure HVAC systems introduce adequate fresh air

Balanced ventilation simultaneously removes stale indoor air and supplies fresh outdoor air.

Regular Cleaning

Consistent cleaning reduces airborne pollutant sources:

  • Vacuum with HEPA-filtered vacuums
  • Damp-dust surfaces regularly
  • Wash bedding weekly in hot water
  • Clean or replace HVAC filters every 1-3 months
  • Address visible mold immediately

Combining cleaning with air purification leads to more significant and noticeable improvements in overall air quality.

Conclusion: Are Air Purifiers Worth It?

Air purifiers are highly effective at improving indoor air quality when:

  • Selected appropriately for specific concerns
  • Sized correctly for the space
  • Maintained properly
  • Used as part of a comprehensive approach

The greatest benefits appear for:

  • Allergy and asthma sufferers
  • Homes in areas with poor outdoor air quality
  • Spaces with temporary pollution concerns (wildfire smoke, renovations)
  • Bedrooms where people spend significant time

For general use, a quality HEPA purifier with moderate carbon filtration provides the best value. Focus on getting the fundamentals right (proper size, proven technology) rather than paying for unnecessary features.

Remember that no air purifier completely eliminates all indoor air quality concerns. Combining filtration with source control, adequate ventilation, and regular cleaning creates the healthiest indoor environment. For those with respiratory concerns, allergies, or specific air quality issues, air purifiers represent a worthwhile investment in both comfort and health.

Back pain affects millions of people worldwide. For those who sit for long hours every day, choosing the right chair is not just about comfort—it’s essential for your health. Poor seating choices often contribute to back problems or worsen existing conditions.

The good news? The right chair can significantly reduce pain and prevent future issues. This guide explores the best chair options for back pain sufferers and the science-backed benefits they provide.

Understanding How Chairs Impact Back Health

Before diving into specific chairs, understanding the relationship between sitting and back pain helps explain why chair selection matters so much.

The Problem with Conventional Chairs

Standard office chairs often create several problems:

  • They promote slouching and poor posture
  • They do not provide adequate lumbar support to maintain the spine’s natural curve.
  • They restrict movement and blood flow
  • They put excessive pressure on the tailbone and spine
  • They cause muscle imbalances over time

Hours in these chairs force the spine into unnatural positions. The muscles that support the back have to work harder, which can cause fatigue, strain, and eventually lead to pain.

How Ergonomic Chairs Help

Ergonomically designed chairs support the body’s natural alignment by:

  • Supporting the spine’s natural S-curve
  • Distributing weight evenly across the sitting surface
  • Encouraging subtle movement rather than static positioning
  • Reducing pressure points on nerves and blood vessels
  • Promoting proper alignment from hips to head

The right chair doesn’t just relieve existing pain—it helps prevent future problems by maintaining proper spinal alignment.

Key Features to Look for in a Back Pain Relief Chair

Not every ergonomic or ‘back-friendly’ chair offers the same level of support. These specific features make the biggest difference for back pain sufferers:

Lumbar Support

The lower back has a natural inward curve. Proper lumbar support maintains this curve while sitting.

What to look for:

  • Adjustable lumbar support that can be positioned to fit your specific spine
  • Sufficient depth to fill the gap between your lower back and the chair
  • Firm yet comfortable pressure against the lumbar region
  • Ability to adjust the amount of support as needed throughout the day

Some advanced chairs offer dynamic lumbar support that flexes with movement, providing consistent contact with the lower back.

Seat Height Adjustability

Proper seat height ensures weight distributes evenly and feet rest flat on the floor.

What to look for:

  • Easy height adjustment controls
  • Enough adjustment to position knees level with or slightly lower than the hips
  • Stable locking mechanism that prevents unwanted height changes
  • Pneumatic adjustment for smooth transitions

When sitting, your feet should be flat on the floor and your thighs should stay parallel to the ground. This posture helps reduce strain on the lower back.

Seat Depth and Width

The seat pan dimensions significantly impact comfort and support.

What to look for:

  • A depth that provides 2 to 4 finger widths of space between the seat edge and the back of the knees.
  • Width that accommodates hips with 1-2 inches of space on each side
  • Adjustable seat depth on premium models
  • Waterfall or rounded front edge to reduce pressure on thighs

A too-deep seat forces users to slouch forward, losing back support. A too-shallow seat provides insufficient thigh support.

Backrest Features

The backrest should support the entire back while encouraging proper posture.

What to look for:

  • The height should be sufficient to support at least the mid-back, ideally extending to the upper back.
  • Width that accommodates your frame while allowing some movement
  • Recline capability with tension adjustment
  • Material that breathes to prevent heat buildup

Some chairs feature backrests that move with the user, maintaining contact during position changes.

Armrest Considerations

Correctly positioned armrests help alleviate strain on the shoulders and upper back.

What to look for:

  • Height adjustability to support arms with shoulders relaxed
  • Width and angle adjustments on premium models
  • Soft material that won’t create pressure points
  • Sufficient width between armrests for comfortable seating

Armrests should allow the user to sit close to the desk without interference while supporting the forearms during typing.

Material and Padding

Chair materials affect both comfort and support.

What to look for:

  • High-density foam that doesn’t compress too easily
  • Breathable fabrics to prevent heat buildup
  • Durable materials that maintain support over time
  • Natural materials for those with sensitivities

Memory foam and gel-infused cushions provide excellent pressure distribution for painful backs.

Types of Chairs for Back Pain Relief

Several chair categories specifically address back pain issues:

Ergonomic Office Chairs

These are the most widely used solutions for relieving workplace back pain.

Benefits:

  • Full adjustability for personalized support
  • Designed for long sitting sessions
  • Professional appearance for workplace settings
  • Wide range of price points and features

Drawbacks:

  • Quality options start at $200 and can exceed $1,500
  • May require time to adjust settings properly
  • Some models prioritize appearance over function

Most back specialists recommend investing in a quality ergonomic office chair if sitting for 4+ hours daily.

Kneeling Chairs

These uniquely designed chairs promote an open hip angle and redistribute the user’s weight for improved posture.

Benefits:

  • Naturally promotes proper spine alignment
  • Reduces lower back pressure
  • Strengthens core muscles
  • Improves posture over time

Drawbacks:

  • Difficult adjustment period for new users
  • Not suitable for all-day sitting
  • Limited adjustability in basic models
  • Can create knee discomfort for some users

Kneeling chairs work well as secondary seating options, allowing users to switch positions throughout the day.

Saddle Chairs

Based on horseback riding posture, these chairs feature a saddle-shaped seat.

Benefits:

  • Opens hip angle to reduce lower back pressure
  • Promotes natural spine curves
  • Encourages active sitting
  • Improves circulation to lower limbs

Drawbacks:

  • Significant adjustment period
  • Not conventional for many workplaces
  • Height requires adjustable desk options
  • Can be uncomfortable for wider body types

Healthcare professionals, especially dentists and surgeons, often choose saddle chairs for the mobility and comfort they provide while seated.

Ball Chairs

These incorporate stability balls into chair-like frames.

Benefits:

  • Promotes active sitting and subtle movement
  • Engages core muscles
  • Improves balance and posture awareness
  • Relatively affordable option

Drawbacks:

  • Limited back support
  • Not suitable for all-day sitting
  • Requires good core strength
  • Ball requires regular inflation

Ball chairs work best as supplementary seating rather than primary chairs.

Recliners with Lumbar Support

For home environments, specially designed recliners offer back pain relief.

Benefits:

  • Allows position changes from sitting to reclining
  • Reduces pressure on spine through weight distribution
  • Often includes heat and massage features
  • Comfortable for longer relaxation periods

Drawbacks:

  • Not suitable for work activities
  • Takes significant space
  • Quality options are expensive
  • May encourage too much sedentary time

These chairs work well for recovery periods and relaxation but shouldn’t replace properly supportive chairs for active tasks.

Special Considerations for Different Back Conditions

Different back problems require specific chair features:

For Herniated Discs

People with herniated discs benefit from:

  • Recline capabilities to reduce spinal pressure
  • Excellent lumbar support to maintain proper curve
  • Seat cushions that prevent pressure on the coccyx
  • Smooth height adjustment to find pain-free positions

Chairs allowing frequent position changes help herniated disc sufferers most.

For Sciatica

Sciatica pain requires attention to:

  • Seat cushion quality and pressure distribution
  • Open hip angle seating to reduce nerve compression
  • Waterfall edge design to prevent leg pressure
  • Height adjustability to find nerve-friendly positions

Many sciatica sufferers benefit from cutout cushions or seats that reduce pressure on the sciatic nerve.

For Upper Back and Neck Pain

Those with upper back issues should prioritize:

  • Full-height backrests with upper back support
  • Adjustable headrests for neck alignment
  • Armrests that adjust to prevent shoulder hunching
  • Swivel capabilities to reduce twisting

The connection between neck and upper back means both areas need proper support.

For Chronic Lower Back Pain

Chronic lower back pain requires:

  • Premium lumbar support with adjustable pressure
  • Seat tilt options to adjust hip angles
  • High-quality cushioning materials
  • Ability to lock the backrest at various recline angles

Some users with chronic pain benefit from alternating between different chair types throughout the day.

The Science Behind Back-Friendly Chairs

Research supports the effectiveness of proper seating for back pain:

  • Studies show properly adjusted ergonomic chairs can reduce lower back pain by 30-50% in office workers
  • Research confirms that sitting at 110-130 degree recline angles reduces spinal disc pressure
  • Electromyography studies demonstrate reduced muscle activity in the back when using appropriate lumbar support
  • Movement-encouraging chairs show benefits for disc nutrition and muscle fatigue reduction

The most effective approach combines good chair design with regular position changes and standing breaks.

Beyond the Chair: Creating a Back-Friendly Workspace

Even the best chair works better with a complete ergonomic setup:

  • Adjust your monitor so the top of the screen is at eye level to help maintain proper head and neck alignment
  • Use adjustable desks to switch between sitting and standing throughout the day.
  • Place keyboards at elbow height with relaxed shoulders
  • Ensure feet rest flat on the floor or footrest
  • Take short movement breaks every 30-45 minutes

A quality chair represents just one component of back pain prevention.

Cost vs. Value: Investing in Spinal Health

Chair prices vary dramatically, from $100 basic models to $1,500+ premium designs. Consider these factors when determining budget:

  • Hours spent sitting daily
  • Severity of back pain (acute problems warrant better support)
  • Durability requirements (better chairs typically last 7-12 years versus 1-3 for budget models)
  • Adjustability needs (more adjustment points generally mean higher costs)

Many back pain specialists suggest a simple formula: invest approximately $100-150 for each year of expected chair life. This typically leads to better quality choices that provide proper support.

Breaking in a New Chair

Even the perfect chair requires an adjustment period:

  • Start with short sitting sessions, gradually increasing time
  • Adjust features systematically, changing one element at a time
  • Give your body 1-2 weeks to adapt to improved posture
  • Consider temporary discomfort normal as muscles adjust
  • Maintain proper sitting posture even with excellent support

Some users experience temporary discomfort when switching to ergonomic chairs as their bodies realign to proper posture.

Maintenance for Lasting Support

Maintaining chair performance ensures continued back support:

  • Regularly check and tighten all adjustment mechanisms
  • Clean upholstery according to manufacturer guidelines
  • Replace worn cushions when compression becomes permanent
  • Lubricate moving parts annually
  • Inspect casters and replace when worn

A well-maintained chair provides consistent support throughout its lifespan.

When to Replace Your Chair

Even quality chairs eventually lose their supportive properties. Consider replacement when:

  • Cushions remain compressed after standing up
  • Adjustment mechanisms no longer hold settings
  • Back support feels insufficient despite adjustments
  • Visible wear affects structural integrity
  • Pain returns despite proper ergonomic setup

With proper maintenance, most high-quality ergonomic chairs can remain effective for 7 to 10 years.

Conclusion: Investing in Spinal Health

Choosing the right chair represents one of the most important decisions for back pain sufferers who sit regularly. The perfect chair combines proper support features with adjustability that accommodates your specific body dimensions and back conditions.

Remember that no chair, however well designed, eliminates the need for movement breaks. The healthiest approach combines quality seating with regular position changes, stretching, and strengthening exercises for back muscles.

By selecting a chair specifically designed to support proper spinal alignment and reduce pressure points, many back pain sufferers experience significant relief. The investment pays dividends not just in comfort, but in productivity, mobility, and long-term health benefits.

The right chair doesn’t just ease back pain—it helps create conditions for healing and prevention of future problems. With proper selection and use, a quality chair becomes an essential tool in maintaining spinal health for years to come.

Home security cameras have transformed from luxury items to practical necessities. Modern systems offer peace of mind, deter potential intruders, and provide valuable evidence when needed. But choosing the right security camera system can feel overwhelming with countless options available.

This guide breaks down everything about home security cameras—from basic types to advanced features. Learn what matters most for different homes and how to create an effective security setup without unnecessary complications.

Types of Home Security Cameras

Security cameras come in several distinct styles, each designed for specific situations and mounting locations.

Outdoor Cameras

Designed to withstand weather elements, outdoor cameras monitor the perimeter of homes. They typically feature:

  • Weather-resistant housing (look for IP65 rating or higher)
  • Night vision capabilities
  • Wider viewing angles
  • Motion detection with adjustable sensitivity

Outdoor cameras act as deterrents and help gather evidence. Visible cameras often prevent crimes before they happen. Popular mounting locations include entry points, driveways, and backyard areas.

Indoor Cameras

These cameras monitor interior spaces with features focused on indoor environments:

  • Smaller, more discreet designs
  • Two-way audio for communication
  • Lower light sensitivity for indoor lighting conditions
  • Often more affordable than outdoor models

Indoor cameras work well in main living areas, near valuables, or monitoring entrances from inside. Many families also use them to check on pets or children when away.

Doorbell Cameras

Video doorbells are one of the fastest-growing categories in security tech, combining the functionality of a traditional doorbell with the added protection of a built-in security camera.

  • Motion detection alerts when someone approaches
  • Two-way communication with visitors
  • Package delivery monitoring
  • Easy installation in place of existing doorbells

These cameras provide a first line of defense by monitoring the most commonly used entry point. Many models can distinguish between people and other motion sources to reduce false alerts.

Floodlight Cameras

These combine bright lighting with security cameras:

  • Powerful LED floodlights activate when motion is detected
  • Wider coverage area than standard cameras
  • Improved night visibility through illumination
  • Stronger deterrent effect against potential intruders

Floodlight cameras work exceptionally well in darker areas like side yards or back entrances where additional lighting improves both security and safety.

Pan-Tilt-Zoom (PTZ) Cameras

These cameras offer remote directional control:

  • Can rotate to cover wider areas
  • Zoom capabilities for detail capture
  • Programmable patrol patterns
  • Adjustable viewing angle from mobile apps

PTZ cameras cost more but can sometimes replace multiple fixed cameras by covering larger areas.

Key Features to Consider

Not all security cameras offer the same functionality. Understanding these key features helps match products to specific needs.

Resolution

Camera resolution determines image clarity:

  • 720p (HD): Basic clarity, budget-friendly
  • 1080p (Full HD): Standard for most modern cameras
  • 2K (1440p): Sharper details, good for wider shots
  • 4K (2160p): Maximum detail, useful for zooming in on footage

Higher resolution captures more detail but requires more storage space and bandwidth. For identifying faces or reading license plates, minimum 1080p resolution is recommended.

Field of View

This measures how wide an area the camera can see:

  • Narrow (60-90 degrees): Focused view of specific areas
  • Standard (90-120 degrees): Balanced coverage
  • Wide (120-180 degrees): Covers large areas with a single camera

Wider isn’t always better. Extremely wide angles can distort images and reduce detail at the edges. Make sure the field of view covers the area you need to monitor.

Night Vision

Night vision is crucial for 24-hour security and comes in various forms:

  • Infrared (IR): Most commonly used, it captures black and white footage in low-light or complete darkness.
  • Color night vision: Captures color footage using ambient or built-in lighting
  • Starlight sensors: Work in extremely low light conditions

Night vision range matters too. Enhanced cameras offer crystal-clear visibility from 30 to 50 feet, even in complete darkness. Test night vision capabilities before final installation.

Power Options

Security cameras need reliable power sources:

  • Wired (AC powered): Continuous operation without battery concerns
  • Battery-powered: Flexible placement without electrical work
  • Solar-powered: Self-sufficient in locations with good sunlight
  • Power over Ethernet (PoE): Transmitting Both Data and Power via a Single Cable

Battery-powered cameras offer simple installation but require regular recharging or battery replacement. Wired cameras need professional installation in some cases but provide worry-free continuous operation.

Storage Solutions

Camera footage requires storage space:

  • Local storage (SD cards): No subscription fees, but limited capacity
  • NVR/DVR systems: Central storage for multiple cameras, no internet required
  • Cloud storage: Remote access and backup, but usually requires subscription
  • Hybrid options: Combination of local and cloud storage

Cloud storage provides better protection against theft or damage but adds monthly costs. Local storage works without internet but remains vulnerable if the device is stolen.

Connectivity Options

How cameras connect affects both setup complexity and reliability:

  • Wi-Fi: Simple setup, no wiring needed
  • Ethernet: More reliable connection, no wireless interference
  • Cellular backup: Continues working if internet fails
  • Bluetooth: Typically only for initial setup

Wi-Fi cameras work well in areas with strong signals. Wired connections offer more dependable performance in critical security areas.

Smart Home Integration

Modern security cameras are increasingly integrated into larger smart home ecosystems:

  • Voice assistant compatibility (Alexa, Google Assistant, Siri)
  • Smart display integration for viewing feeds
  • Automation triggers (lights turn on when camera detects motion)
  • Integration with smart locks and alarm systems

The best smart home security systems work together seamlessly. Ensure compatibility with your existing smart home devices before making a purchase.

Advanced Features Worth Considering

Several newer features significantly improve security camera functionality.

AI-Powered Detection

Artificial intelligence reduces false alerts and provides smarter notifications:

  • Person detection: Distinguishes humans from animals or objects
  • Facial recognition: Identifies specific people (family vs. strangers)
  • Package detection: Alerts when deliveries arrive
  • Pet detection: Ignores pet movement to reduce false alerts

These smart detection features filter out irrelevant motion from trees, cars, or pets, making notifications more meaningful.

Two-Way Audio

This feature enables remote communication through the camera:

  • Speak to visitors or delivery personnel
  • Warn potential intruders they’re being recorded
  • Check in with family members
  • Give instructions to service providers

Two-way audio turns passive monitoring devices into interactive communication tools.

Sound Detection

Beyond video, some cameras listen for specific sounds:

  • Glass break detection
  • Smoke/CO alarm recognition
  • Baby crying alerts
  • Loud noise monitoring

Sound detection provides extra security coverage for events that might happen outside the camera’s visual field.

Activity Zones

This feature focuses monitoring on specific areas within the camera’s view:

  • Monitor doorways while ignoring busy streets
  • Watch windows but ignore swaying trees nearby
  • Focus on driveways without alerts from passing sidewalk traffic

Activity zones drastically reduce false alerts in busy environments.

Continuous Recording vs. Event-Based

Recording options affect both storage needs and security coverage:

  • Continuous recording: Records everything 24/7, maximum security
  • Event-based recording: Saves footage only when movement is detected
  • Pre-roll capture: Includes several seconds before motion triggers
  • Scheduled recording: Activates during specific time periods

Continuous recording provides complete coverage but requires additional storage space. Event-based recording conserves storage but might miss important moments.

Installation and Placement Tips

Even the best camera performs poorly if improperly installed. These placement tips maximize effectiveness:

Outdoor Camera Placement

  • Install cameras 8-10 feet high to prevent tampering but remain accessible for maintenance
  • Cover all entry points: doors, ground-floor windows, garage doors
  • Position cameras where they cannot be easily reached or disabled
  • Avoid pointing cameras directly at bright light sources (sun, street lights)
  • Consider privacy concerns for neighbors’ property

Many security experts recommend visible outdoor cameras as deterrents rather than hidden cameras that only provide evidence after incidents occur.

Indoor Camera Placement

  • Focus on main entry points inside the home
  • Cover rooms with valuable items
  • Position in corners for maximum coverage
  • Avoid bathrooms and changing areas for privacy
  • Consider pet heights and movements to reduce false alerts

Indoor cameras work best when covering transition spaces like hallways where anyone moving through the home must pass.

Wiring Considerations

For wired cameras, protect their vulnerability:

  • Conceal wires when possible
  • Use protective conduit for exposed wiring
  • Ensure outdoor connections are weatherproofed
  • Plan cable routes before installation

Poor wiring creates both reliability issues and security vulnerabilities if wires can be easily cut.

Privacy and Security Concerns

Security cameras should enhance safety without creating new vulnerabilities:

Camera System Security

  • Change default passwords immediately
  • Enable two-factor authentication when available
  • Keep firmware updated regularly
  • Use strong, unique passwords for accounts
  • Check manufacturer security track record before purchasing

Unsecured cameras can become surveillance tools for hackers rather than protection for homes.

Privacy Considerations

Respect legal and ethical boundaries:

  • Never point cameras at neighbors’ private spaces
  • Inform household members and regular visitors about camera locations
  • Consider establishing camera-free zones for personal privacy
  • Be aware of local laws regarding recording audio and video
  • Establish clear policies about footage access and retention

Most locations permit recording video in public spaces visible from private property, but audio recording laws vary significantly by region.

Cost Considerations

Security camera systems range from under $30 to several thousand dollars. Understanding the true cost helps with budgeting:

Equipment Costs

  • Basic indoor cameras: $25-$100 each
  • Quality outdoor cameras: $100-$250 each
  • Doorbell cameras: $100-$300 each
  • Complete systems (4-8 cameras with NVR): $200-$1000
  • Professional-grade systems: $1000+

Ongoing Costs

  • Cloud storage subscriptions: $3-$15 monthly per camera
  • Professional monitoring services: $10-$50 monthly
  • Battery replacements for wireless cameras
  • Electricity usage
  • Potential installation costs: $100-$500 depending on complexity

Some manufacturers require subscriptions to enable basic features. Always verify which functions work without subscriptions before purchasing.

DIY vs. Professional Installation

The installation approach affects both cost and effectiveness:

DIY Benefits

  • Lower overall cost
  • Flexible timing
  • No strangers in the home
  • Learning opportunity

Professional Installation Benefits

  • Expertise in optimal placement
  • Proper wiring and weatherproofing
  • Integration with existing systems
  • Potential warranty benefits

Many homeowners choose a hybrid approach—professional installation for critical outdoor cameras and complex wiring, with DIY for simpler indoor cameras.

Maintenance Requirements

Security cameras need regular maintenance to function reliably:

  • Clean lenses quarterly or after weather events
  • Check and adjust positioning seasonally
  • Update firmware when available
  • Test motion detection sensitivity periodically
  • Replace batteries in wireless cameras as needed
  • Verify storage capacity and manage recordings

A neglected security system creates a false sense of security. Regular testing ensures the system works when needed.

Legal Considerations

Security cameras exist in a complex legal landscape:

  • Most locations permit video recording of your own property
  • Many jurisdictions require posting notices about video surveillance
  • Audio recording laws vary significantly by country and state
  • HOA restrictions may limit camera placement or visibility
  • Rental properties may require landlord approval

Research local regulations before installation to avoid legal complications.

Conclusion

Home security cameras provide valuable protection when properly selected, installed, and maintained. The best system balances coverage needs with budget constraints while respecting privacy considerations.

When selecting cameras, prioritize features based on specific security concerns rather than simply buying the most expensive option. Often, strategically placed mid-range cameras provide better overall security than a single premium camera. Remember that cameras form just one part of comprehensive home security. Combine them with good lighting, secure locks, and basic security habits for maximum effectiveness. With thoughtful implementation, home security cameras provide not just evidence after incidents but genuine peace of mind and crime prevention.

In today’s connected world, electronic devices power our daily lives. Smartphones, laptops, tablets, wireless earbuds, and smartwatches keep us productive and entertained. But one universal frustration remains: battery life. Nothing disrupts productivity quite like seeing that red battery icon at a critical moment.

Most users want their devices to last longer between charges. The good news? Small adjustments in habits and settings can greatly improve battery life. This guide covers practical tips that work across most devices.

Understanding Battery Basics

Before diving into tips, understanding how batteries work helps explain why these strategies work.

Lithium-Ion Batteries

Most modern devices use lithium-ion batteries. These batteries have several key characteristics:

  • They have no “memory effect”
  • They perform best when kept between 20% and 80% charged
  • Heat is their biggest enemy
  • They have a limited number of charge cycles

Each complete charge cycle (from 0% to 100%) slightly degrades maximum capacity. After hundreds of cycles, batteries hold noticeably less charge than when new.

Battery Health vs. Battery Life

Two terms often get confused:

Battery life indicates the duration a device can operate on a single charge before it needs to be recharged.

Battery health refers to the current capacity of the battery in relation to its original capacity when it was new.

Good habits improve both. The tips below focus on extending daily battery life while preserving long-term battery health.

General Tips for All Devices

These strategies work for smartphones, tablets, laptops, and most other rechargeable devices.

1. Optimize Screen Brightness

Screens consume massive amounts of battery power. Lower brightness levels dramatically extend runtime.

Tips:

  • Enable auto-brightness to adapt to ambient light
  • Manually lower brightness when possible
  • Use dark mode when available

Many users keep brightness higher than necessary. Even a 20% reduction often remains perfectly readable while adding significant battery life.

2. Manage Background Activities

Apps and processes running in the background drain battery even when not actively used.

Tips:

  • Close unused apps completely
  • Disable background app refresh for non-essential apps
  • Turn off automatic updates or schedule them while charging
  • Check battery usage statistics to identify power-hungry apps

Background activities account for up to 25% of battery usage on many devices. Regular audits of running processes yield substantial power savings.

3. Use Wi-Fi Instead of Cellular Data

Cellular connections (especially 5G) require more power than Wi-Fi.

Tips:

  • Connect to Wi-Fi networks when available
  • Disable cellular data when not needed
  • Consider switching to 4G/LTE if battery life matters more than speed

Tests show devices can last 20-40% longer on Wi-Fi compared to cellular connections in areas with weak signals.

4. Turn Off Unused Connections

Bluetooth, GPS, NFC, and other wireless technologies constantly consume power.

Tips:

  • Disable Bluetooth when not paired with devices
  • Turn off GPS/Location services when not navigating
  • Disable NFC if rarely used
  • Use airplane mode in areas with poor reception

Each wireless technology might only use a small amount of power individually, but together they create significant drain.

5. Optimize Temperature

Batteries work best between 62°F and 72°F (16-22°C). Heat drastically reduces performance and long-term health.

Tips:

  • Keep devices out of direct sunlight
  • Remove protective cases while charging (they trap heat)
  • Avoid leaving devices in hot cars
  • Don’t use devices while charging if they get noticeably warm

Heat accelerates chemical reactions inside batteries that cause permanent capacity loss. Keeping devices cool can double battery lifespan.

6. Practice Better Charging Habits

How and when devices charge affects long-term battery health.

Tips:

  • Avoid complete discharges when possible
  • Don’t constantly top up to 100%
  • Unplug once fully charged if the device won’t implement charging limits
  • Use original chargers or certified alternatives

Battery experts recommend keeping charge levels between 20% and 80% whenever possible. This “sweet spot” minimizes stress on the battery’s chemistry.

Device-Specific Tips

While the principles above apply broadly, each device type has unique considerations.

Smartphones

Phones present particular challenges due to their always-on nature and small batteries.

Tips:

  • Enable battery saver or low power mode
  • Set shorter screen timeout periods
  • Use adaptive battery features (available on newer Android devices)
  • Disable vibration and haptic feedback
  • Reduce notifications for non-essential apps
  • Switch to static wallpapers instead of animated ones
  • Disable “OK Google” or “Hey Siri” always-on listening

Modern smartphones include detailed battery usage statistics. Reviewing these regularly helps identify unexpected battery drains.

Laptops and Notebooks

Laptops combine powerful components with limited battery capacity, creating unique power management needs.

Tips:

  • Use built-in power management settings (Power Saver or Battery Saver mode)
  • Decrease screen refresh rate when on battery
  • Disable keyboard backlighting when not needed
  • Close resource-intensive programs when unplugged
  • Use built-in graphics instead of dedicated GPU for non-gaming tasks
  • Reduce browser tabs and extensions
  • Connect external devices only when necessary

Laptop manufacturers often provide specialized power management software. These utilities typically offer more granular control than operating system defaults.

Tablets

Tablets fall between phones and laptops in terms of battery management.

Tips:

  • Disable push email or set longer fetch intervals
  • Use reader modes in browsers when available
  • Download content for offline use instead of streaming
  • Keep apps updated (newer versions often improve efficiency)

For iPads and Android tablets used mainly for media consumption, optimizing video playback settings offers significant battery improvements.

Wireless Earbuds and Headphones

These small devices present unique challenges due to their tiny batteries.

Tips:

  • Return them to their case when not actively listening
  • Turn off features like active noise cancellation when they’re not in use to conserve power and optimize performance
  • Keep firmware updated for power optimizations
  • Clean charging contacts regularly

Wireless earbuds come with a charging case that has a built-in battery to recharge the earbuds on the go. Both the earbuds and case benefit from the same battery care principles.

Smartwatches and Fitness Trackers

Wearables pack sophisticated technology into very small packages with minimal battery capacity.

Tips:

  • Use simplified watch faces (fewer complications and animations)
  • Reduce screen wake frequency
  • Disable always-on display features
  • Turn off continuous heart rate monitoring when not exercising
  • Customize notification settings to reduce unnecessary alerts

Many users find that smartwatches last significantly longer after disabling features they rarely use.

Software Updates and Battery Life

Software updates present an interesting battery dilemma. They often include power optimizations but might also add new features that increase power consumption.

Tips:

  • Always apply security updates regardless of battery impact
  • Read release notes for mentions of battery improvements
  • Wait a few days after major OS updates to see user reports about battery performance
  • Consider delaying non-essential updates if current battery life is satisfactory

Many devices see temporary battery drain after major updates while they reindex data or optimize systems. This usually resolves within a few days.

Identifying Battery Drains

Sometimes battery life suddenly decreases without obvious cause. Systematic troubleshooting helps identify culprits.

Tips:

  • Check battery usage statistics
  • Look for recently installed apps or updates
  • Monitor device temperature
  • Temporarily disable suspected apps to isolate problems
  • Test in safe mode if available

Many modern devices provide detailed battery usage graphs showing which apps and services consume the most power. These tools prove invaluable for troubleshooting.

When To Replace Batteries

Even with perfect care, rechargeable batteries eventually degrade. Recognizing when replacement makes sense saves frustration.

Signs it’s time for battery replacement:

  • Device shuts down unexpectedly despite showing battery remaining
  • Battery depletes noticeably faster than when new
  • Device gets unusually hot during normal use
  • Battery swells or deforms
  • Battery health reports show less than 70% of original capacity

Most modern smartphones and laptops provide an option to view battery health status directly within their settings menu. For phones, batteries typically remain serviceable for 2-3 years of heavy use. Laptop batteries typically last 2-4 years depending on usage patterns.

Power Banks and External Batteries

For situations where maximizing runtime takes priority, external power solutions help.

Tips for choosing power banks:

  • Check capacity (measured in mAh or Wh)
  • Verify charging speeds (look for Power Delivery support)
  • Consider size and weight for portability
  • Choose reputable brands with safety certifications

A quality power bank extends device usability without needing wall outlets. This proves especially valuable during travel or emergencies.

Myths About Battery Care

Several persistent myths about battery care continue circulating. Clearing these up helps develop better habits.

Myth 1: Always drain batteries completely before recharging This applied to older nickel-cadmium batteries but actually harms modern lithium-ion batteries.

Myth 2: Charging overnight ruins batteries Modern devices stop charging when full. However, keeping batteries at 100% for extended periods still causes gradual stress.

Myth 3: Off-brand chargers always damage batteries Quality matters more than brand. Certified third-party chargers with proper specifications work safely, though manufacturer chargers often provide optimal charging profiles.

Myth 4: Battery calibration requires regular complete discharges Modern devices track battery capacity without needing manual calibration. Complete discharges actually cause unnecessary wear.

Long-term Storage Tips

For devices not used regularly, proper storage preserves battery health.

Tips:

  • Charge devices to around 50% before extended storage
  • Power devices off completely (not just sleep mode)
  • Store in cool, dry environments

Recharge to 50% every few months if the storage period exceeds 6 months

These practices prevent extreme discharge while avoiding the stress of high charge levels during storage.

Conclusion

Battery technology improves constantly, but following these guidelines maximizes the life of current devices. Small adjustments to your habits can lead to substantial improvements in both daily performance and long-term battery life.

Remember these key principles:

  • Moderate brightness saves substantial power
  • Background activities drain batteries silently
  • Heat damages batteries permanently
  • Charging between 20-80% extends battery lifespan
  • Regular software maintenance improves efficiency

With these practices, devices last longer between charges and maintain better battery health over their lifetime. This saves money, reduces frustration, and helps devices remain reliable when needed most. Which tip will you implement first? Even applying just one or two suggestions from this guide will noticeably improve battery performance across all electronic devices.

Robot vacuums promised to free homeowners from the chore of vacuuming. Just press a button and watch it work magic on floors! But anyone who’s owned one for a while knows they’re not perfect. They get stuck. They miss spots. They die mysteriously in the middle of living rooms.

After years of use, most robot vacuum owners face every frustration imaginable. The good news? Most problems have simple fixes.

Let’s look at the five most common robot vacuum issues and how to solve them.

1. Poor Navigation and Getting Stuck

Nothing’s more annoying than hearing that distress beep from under the couch. Again.

Why It Happens

Robot vacuums use different navigation systems. Budget models bump around randomly. Advanced ones use lasers or cameras to map homes. But even the smartest robots get confused by:

  • Dark carpets (sensors mistake them for stairs)
  • Threshold strips between rooms
  • Furniture with clearance just high enough for the robot to enter but too low to navigate properly
  • Stray cables or small objects
  • Shag rugs with long fibers

Many users report finding their vacuum trapped under furniture for hours, circling endlessly until the battery dies. The robot thinks it can escape but keeps hitting obstacles.

How to Fix It

  • Create a “robot-friendly” environment before running the vacuum. Pick up cables, socks, and small toys.
  • Use boundary strips or virtual barriers that come with most vacuums. Place them in front of problem areas.
  • Block low furniture with books or boxes if the robot frequently gets trapped underneath.
  • Keep an eye on dark carpets. Some models have stair sensors that get confused by dark colors. Cover these sensors with white tape (check the manual first).
  • Clean the sensors monthly. Dust on navigation sensors causes erratic behavior.

A quick “robot scan” of each room before starting the vacuum can reduce stuck incidents by about 80%.

2. Battery Dies Too Quickly

Many users expect hours of cleaning, but find their robot returns to the dock after 20 minutes. Frustrating!

Why It Happens

Battery issues usually stem from:

  • Age (batteries degrade over time)
  • Running on high-power modes
  • Clogged brushes creating extra resistance
  • Cleaning very dirty areas requiring more power
  • Software issues affecting battery management

Most robot vacuums last nearly two hours when new. Six months later, many barely manage 45 minutes.

How to Fix It

  • Clean the brushes and wheels after every few uses. Hair and debris create resistance and drain power.
  • Use eco or low-power mode for maintenance cleaning. Save max power for deep cleaning days.
  • Replace the battery if it’s more than 1-2 years old. Most manufacturers sell replacement batteries.
  • Check for software updates. Manufacturers often improve battery management through updates.
  • Use scheduled cleaning instead of manual starts. Most robots optimize their cleaning patterns when on a schedule.

Replacing an old vacuum’s battery and keeping the brushes clean can restore nearly 70% of the original runtime.

3. Poor Cleaning Performance

Perhaps the biggest disappointment: floors don’t look much cleaner after the robot finishes.

Why It Happens

Several factors affect cleaning performance:

  • Clogged brushes and filters
  • Full dust bin limiting suction
  • Worn-out brushes
  • Inappropriate settings for the floor type
  • Unrealistic expectations (robots can’t deep clean like upright vacuums)

Many users notice their robots leaving dust streaks behind. Checking the main brush often reveals a tangled mess of hair that prevents proper rotation.

How to Fix It

  • Empty the dust bin after each use. Many robots lose suction when the bin is just half full.
  • Clean or replace filters monthly. Dirty filters kill suction power.
  • Check and clean brushes weekly. Remove tangled hair and threads.
  • Replace brushes every 6-12 months depending on use. Worn brushes can’t agitate carpet properly.
  • Run the robot more frequently. They work best with light, regular maintenance rather than tackling heavily soiled floors.
  • Pre-clean extreme messes. While awkward, quickly picking up larger debris before a robot run improves results dramatically.

Establishing a maintenance routine improves floor cleaning dramatically. Emptying the bin after each use and cleaning brushes twice weekly makes a noticeable difference.

4. Mapping and Coverage Problems

The robot claims it’s cleaned the whole house, but untouched areas and missed rooms are clearly visible.

Why It Happens

Mapping issues typically occur because:

  • The robot needs multiple runs to create an accurate map
  • Moved furniture confuses the navigation system
  • Low light affects camera-based navigation systems
  • The robot ran out of battery before finishing
  • Connection problems with WiFi-based mapping

Some robots will skip entire rooms some days, while cleaning other areas twice. The mapping system can seem completely random.

How to Fix It

  • Run training runs if the model offers this feature. This lets the robot explore without cleaning to create a map.
  • Ensure adequate lighting for camera-based models. Some robots can’t navigate well in dark rooms.
  • Keep doors open during initial mapping runs. Closed doors after mapping may confuse some models.
  • Check WiFi strength throughout the home. Weak signals can interrupt mapping data transmission.
  • Update the robot’s software. Mapping algorithms improve over time.
  • Maintain a consistent home layout when possible. Major furniture changes may require remapping.

After complete mapping runs with all doors open, most robots create accurate maps of homes. Then they clean methodically without missing areas.

5. App Connectivity and Software Issues

Modern robot vacuums rely on apps and WiFi. When they disconnect or glitch, it’s maddening.

Why It Happens

Tech issues usually stem from:

  • WiFi connection problems
  • Outdated robot firmware
  • App bugs after phone updates
  • Server outages from the manufacturer
  • Incompatible router settings

Many users spend hours troubleshooting perfectly functional robots that won’t connect to apps. A common culprit? Phones switched to 5GHz WiFi while the robot only supports 2.4GHz.

How to Fix It

  • Position the router centrally in the home for better signal coverage.
  • Ensure the robot supports the WiFi band (most only work with 2.4GHz, not 5GHz).
  • Restart everything: the app, the phone, the robot, and the router. Simple but effective!
  • Check for firmware updates through the app or manufacturer’s website.
  • Reset the robot to factory settings as a last resort, then set it up fresh.
  • Use physical controls when possible. Most robots have manual buttons for basic functions.

Switching phones to 2.4GHz networks and restarting routers often resolves connection problems immediately.

Maintenance Tips to Prevent Future Problems

Prevention beats troubleshooting. Here’s how to keep robot vacuums running smoothly:

  • Create a maintenance schedule. Mark calendar days for filter cleaning, brush inspection, and sensor wiping.
  • Keep spare parts on hand. Brushes, filters, and cleaning tools make quick fixes possible.
  • Clean sensors monthly with a soft, dry cloth. Pay special attention to cliff sensors on the bottom.
  • Remove and clean wheels occasionally to remove wrapped hair and debris.
  • Check the charging contacts on both the robot and dock. Clean with alcohol wipes if they look dirty.

Setting monthly calendar reminders for maintenance takes just 10 minutes but saves hours of troubleshooting later.

When to Call for Help (or Replace Your Robot)

Despite best efforts, some problems need professional attention. Consider reaching out to customer support if:

  • The robot repeatedly throws the same error code
  • Battery life suddenly drops dramatically
  • The vacuum makes unusual noises
  • Basic functions stop working despite troubleshooting

And sometimes, replacement makes more sense than repair. Most robot vacuums last 4-5 years with proper care. If the unit is older and problematic, newer models offer better navigation, stronger suction, and improved obstacle avoidance.

Conclusion

Robot vacuums make life easier, but only when they work properly. With the fixes above, users spend less time troubleshooting and more time enjoying clean floors.

Remember: no robot vacuum completely replaces traditional vacuuming. Think of robot vacuums as helpful assistants that handle day-to-day maintenance, with occasional human intervention for deeper cleaning. What problems have been encountered with robot vacuums? These fixes might just help make the robot become a favorite household helper again!

As our audio experience grows even more personal and portable, the struggle between wired and wireless earbuds has become much more than just a convenience—it’s tied to so much more! Sound quality, battery anxiety, comfort, and value are part of that struggle. As we shift through personal audio in 2025, both wired and wireless earbuds are developing, expanding the once clear line between them.

This in-depth comparison takes a serious look at the real differences between wired and wireless earbuds; look at their strengths, weaknesses, and the best situations for using each to help you make what is best for you in terms of audio need, lifestyle, and preferences—not just marketing representation.

Sound Quality: The Audiophile Point of View

For a large number of users, audio performance is still the primary consideration when choosing which earbuds to choose. Let’s quickly address how each technology performed in this aspect.

Wired Earbuds: The Traditional Champion

Wired earbuds have many advantages over wireless earbuds when it comes to the sound quality:

Stable Signal Quality: The wired connection is constant and does not require the digital compression involved in a wireless connection. Wired earbuds can provide the complete signal as it was intended without data compression, or signal loss.

Zero Latency: There is no latency involved with a wired connection. The signal is immediately transmitted through the cable, ensuring it is delivered in-sync with video content, which is important for gaming and video watching.

Higher Resolution Audio Support: Several leading-edge wired earbuds offer compatibility with higher resolution audio codecs in 24-bit/192kHz and even beyond, keeping subtle details preserved from being degraded over wireless signals.

No Digital-to-Analog Conversion Limitations: Wired earbuds utilize the source device’s DAC (Digital-to-Analog Converter), which in high-end smartphones or stand-alone audio players is typically superior to the miniaturized DACs in wireless earbuds.

Power Advantage: Direct power from the source device allows more power-hungry, more-performance drivers without battery power problems.

Wireless Earbuds: Closing the Gap

While wireless earbuds historically sacrificed sound quality for convenience, the gap has narrowed significantly:

Advanced Codecs: Premium wireless earbuds now support high-quality Bluetooth codecs like LDAC, aptX Lossless, and LC3plus, offering near-lossless audio transmission with compatible devices.

Dedicated Processing: Many wireless earbuds include dedicated DSPs (Digital Signal Processors) that can compensate for acoustic limitations through careful tuning, active noise cancellation, and spatial audio processing.

Customized Sound Profiles: Companion apps allow users to create personalized EQ settings and sound profiles, sometimes even incorporating hearing tests to optimize audio for individual ear structures.

Integrated Amplification: Quality wireless earbuds feature precisely matched amplifiers and drivers designed to work together, sometimes outperforming the generic amplification in source devices used with wired earbuds.

Verdict: While audiophiles with trained ears will still detect the advantages of high-end wired earbuds, the quality gap has narrowed to the point where most casual listeners would struggle to identify significant differences in blind tests, particularly when using premium wireless options with advanced codecs.

Convenience: The Freedom Factor

The rise of wireless technology has been a key factor behind the increasing popularity of earbuds in today’s market.

Wireless Earbuds: Untethered Experience

The wireless advantage is most apparent in mobility and everyday usability:

Freedom of Movement: No cables means unrestricted movement for workouts, commuting, or household chores without catching or tangling wires.

Device Compatibility: As smartphones increasingly abandon headphone jacks, wireless earbuds offer universal compatibility without adapters.

Charging Case Convenience: Most wireless earbuds come with portable charging cases that protect the earbuds and extend battery life throughout the day.

Smart Features: Many wireless models offer touch or voice controls, wear detection for automatic play/pause, and digital assistant integration—features impossible to implement in purely analog wired earbuds.

Multi-Device Connectivity: Higher-end wireless earbuds can connect to multiple devices simultaneously, allowing seamless switching between phone, tablet, and computer.

Wired Earbuds: Simplicity and Reliability

Despite seeming old-fashioned, wired connections offer their own form of convenience:

Zero Setup Time: Plug and play functionality with no pairing process or connection issues.

No Charging Required: Elimination of battery anxiety and charging routines altogether.

Never Lost: The physical connection between earbuds means they’re less likely to be separated or lost.

Longevity: Without batteries that degrade over time, quality wired earbuds can last many years or even decades with proper care.

Universal Compatibility: Standard 3.5mm connections work with virtually any device with a headphone jack, though adapters may be required for newer smartphones.

Verdict: For most everyday scenarios involving movement or exercise, wireless earbuds offer superior convenience. However, in situations where reliability and simplicity are paramount, or for longer listening sessions where battery life becomes a concern, wired options maintain distinct advantages.

Battery Life and Longevity: The Long-Term Investment

When considering the overall value and lifespan of your purchase, battery limitations become a significant factor.

The Wireless Battery Equation

Wireless earbuds face inherent challenges related to their power requirements:

Limited Listening Time: Even the best true wireless earbuds typically provide 5-12 hours of continuous playback before requiring recharging, with features like ANC often reducing this further.

Battery Degradation: All lithium-ion batteries degrade over time, meaning wireless earbuds will eventually hold less charge than when new—typically losing 20-30% capacity after 500 charge cycles.

End-of-Life Concerns: When the battery no longer holds sufficient charge, the entire product often becomes effectively disposable, as battery replacement services are limited and sometimes cost-prohibitive.

Environmental Impact: The combination of complex electronics and batteries makes wireless earbuds challenging to recycle properly.

Wired Sustainability

The simplicity of wired designs offers significant longevity advantages:

Unlimited Listening Time: No battery means no time limits on your listening sessions.

Decades of Potential Use: With no battery degradation, quality wired earbuds can last indefinitely if properly maintained, with only occasional cable replacements if damaged.

Repairability: Many premium wired models feature replaceable cables and even replaceable drivers in some professional models.

Simpler Recycling: With fewer complex components and no batteries, wired earbuds have a smaller environmental footprint.

Verdict: For longevity and sustainability, wired earbuds clearly outperform their wireless counterparts. However, the convenience of wireless may outweigh these considerations for many users, especially those who regularly upgrade their audio gear.

Comfort and Fit: The Wearability Factor

Comfort significantly impacts how much you’ll enjoy using your earbuds, regardless of their technical specifications.

Wireless Design Advantages

The absence of cables has allowed wireless earbuds to evolve in several comfort-enhancing ways:

Weight Distribution: Without cable drag, wireless earbuds can achieve better balance and stability.

Customizable Fit Options: Many wireless models include multiple ear tip sizes and optional wing tips or hooks for secure fit.

Activity-Specific Designs: Some wireless earbuds are specifically engineered for particular activities like running or sleeping.

Pressure Relief Vents: High-end wireless models frequently feature pressure-relief vents that help minimize ear fatigue during extended listening periods.

Wired Comfort Considerations

Traditional wired designs have their own ergonomic aspects to consider:

Cable Management: The constant presence of cables requires thoughtful routing to avoid irritation or tangling.

Lighter In-Ear Units: Without having to house batteries and wireless components, wired earbuds can be smaller and lighter in the ear.

Balanced Armature Technology: Many high-end wired earbuds utilize multiple balanced armature drivers that can be arranged for optimal weight distribution and smaller form factors.

Verdict: Comfort is highly individual, depending on ear anatomy and personal preferences. Wireless designs have generally improved in ergonomics as the technology has matured, but premium wired options often maintain an advantage in long-session comfort due to their lighter in-ear weight.

Price-to-Performance Ratio: Value Proposition

Understanding the value equation helps determine which technology offers better alignment with your priorities and budget.

The Wired Value Advantage

Dollar for dollar, wired technology typically delivers superior audio performance:

Audio Quality Per Dollar: Wired earbuds can dedicate their entire production cost to sound quality components rather than wireless technology and batteries.

Entry-Level Excellence: Even budget wired earbuds (under $50) can deliver impressive sound quality compared to wireless options at similar price points.

Professional Options: The wired market includes professional in-ear monitors ranging from $100 to $3000+, offering unparalleled audio quality for serious enthusiasts.

Longevity Factor: The longer potential lifespan of wired earbuds improves their lifetime value proposition.

Wireless Value Considerations

The wireless premium brings additional functionality beyond pure audio performance:

Feature Integration: The cost includes conveniences like touch controls, automatic pausing, transparency modes, and noise cancellation.

Technology Investment: Premium wireless models incorporate significant R&D in miniaturized components, custom chips, and advanced signal processing.

Ecosystem Integration: Many wireless earbuds offer seamless integration with specific device ecosystems (Apple, Samsung, Google), adding functional value for users of those platforms.

Price Trends: As wireless technology has matured, prices have decreased substantially, with capable wireless options now available at nearly every price point.

Verdict: For pure audio quality per dollar spent, wired earbuds maintain a clear advantage. However, when factoring in the additional features and conveniences of wireless options, the value equation becomes more personal and use-case dependent.

Use Case Scenarios: Making the Right Choice

Different listening environments and activities may favor one technology over the other.

When Wired Earbuds Excel

Several scenarios make wired options particularly compelling:

Critical Listening Sessions: For focused music appreciation where audio quality is paramount.

Professional Audio Work: Recording, mixing, and audio production where latency and signal quality are critical.

Gaming: Where even milliseconds of audio delay can impact gameplay experience.

Long Flights or Travel: Situations where battery life would be a concern and movement is limited anyway.

Budget Constraints: When maximizing sound quality at lower price points is the priority.

When Wireless Shines

Wireless technology offers clear advantages in many modern use cases:

Fitness and Physical Activity: Running, gym workouts, and sports where cables would interfere with movement.

Commuting and Travel: Where cable management would be cumbersome in crowded spaces.

Work-From-Home: Taking calls and moving around your home while remaining connected.

Multi-Device Users: Seamlessly switching between phone, tablet, laptop, and other devices.

Modern Smartphone Users: Using devices without headphone jacks where adapters would be inconvenient.

Connection Reliability: The Dependability Factor

The reliability of your audio connection can significantly impact user experience in different environments.

Wired Reliability

Physical connections offer inherent stability advantages:

Consistent Performance: No interference or signal dropouts due to physical obstacles.

No Pairing Issues: Elimination of Bluetooth connection problems and pairing procedures.

Cross-Device Compatibility: Standard connections work universally without compatibility concerns.

No Firmware Dependencies: Performance doesn’t rely on software updates or firmware stability.

Wireless Connectivity Considerations

Wireless technology has improved dramatically but still faces inherent challenges:

Environmental Interference: Crowded wireless environments like city centers or tech conventions can still cause connectivity issues.

Range Limitations: Even the best Bluetooth connections typically maintain optimal quality only within 30 feet of the source device.

Device-Specific Performance: Connection stability can vary between source devices based on their Bluetooth implementation.

Multipoint Challenges: Maintaining stable connections to multiple devices simultaneously can be problematic for some wireless models.

Verdict: For absolute connection reliability, wired earbuds remain superior. However, modern Bluetooth 5.3 and upcoming 6.0 implementations have largely eliminated the frequent dropouts and pairing headaches that plagued earlier wireless generations.

Special Features: Beyond Basic Audio

Modern earbuds, particularly wireless models, offer functionality extending far beyond simple audio reproduction.

Wireless Smart Features

The integration of processors and batteries enables numerous advanced features:

Active Noise Cancellation (ANC): Digital processing that reduces environmental sounds, creating a more immersive listening experience.

Transparency/Ambient Modes: Allow environmental sounds to pass through when needed for awareness.

Spatial Audio: Processing that creates virtual surround sound environments for more immersive experiences.

Find My Feature: Location tracking to help locate lost earbuds.

Hands-Free Voice Assistants: Always-listening microphones for assistant activation without touching your phone.

Health Monitoring: Some advanced models now include heart rate, body temperature, or even posture monitoring.

Wired Added Functions

While more limited, some wired models incorporate useful features:

Inline Remote Controls: Physical buttons for volume, playback, and call management.

Passive Noise Isolation: Well-designed ear tips can provide significant noise reduction without active processing.

Balanced Connections: High-end models may support balanced audio outputs for improved channel separation and detail.

Modular Designs: Some professional models allow swapping between different cables or even drivers.

Verdict: For users who value integrated smart features and digital processing capabilities, wireless earbuds offer significant advantages that wired options simply cannot match due to their fundamental design limitations.

Making Your Decision: Key Considerations

When deciding between wired and wireless earbuds in 2025, consider these essential factors:

  1. Primary Use Environment: Consider where and how you’ll use your earbuds most frequently.
  2. Movement Requirements: Assess how much freedom of movement matters in your typical listening scenarios.
  3. Listening Duration: Think about how long your typical listening sessions last without breaks.
  4. Audio Quality Sensitivity: Be honest about whether you can appreciate the subtle differences in audio quality.
  5. Budget Allocation: Determine whether you value additional features or pure audio performance more highly.
  6. Device Ecosystem: Consider compatibility with your primary source devices and whether specific integration features matter to you.
  7. Environmental Impact: Factor in the longer lifespan of wired options against the convenience of wireless if sustainability concerns you.

Conclusion: Coexistence Rather Than Competition

The reality of the wired versus wireless debate in 2025 isn’t about declaring an overall winner—it’s about recognizing that these technologies increasingly serve different needs and use cases rather than directly competing.

Many audio enthusiasts find that maintaining both options provides the best of both worlds: wireless earbuds for everyday convenience, workouts, and commuting; wired options for critical listening sessions, gaming, and situations where battery life or absolute audio quality takes priority.

As both technologies continue advancing, consumers benefit from having more specialized tools for different audio experiences rather than a one-size-fits-all solution. By understanding the strengths and limitations of each approach, you can make an informed choice that aligns with your unique listening habits, environments, and priorities—or perhaps even decide that having access to both technologies best serves your diverse audio needs. Whether you value the untethered freedom of wireless or the uncompromised fidelity of wired connections, today’s market offers exceptional options at every price point for both technologies. The ultimate winner isn’t wired or wireless—it’s the listener who chooses the right tool for their specific audio journey.

The thrill of descending a technical trail, the satisfaction of conquering a challenging climb, and the pure joy of exploring natural landscapes on two wheels—mountain biking offers an unparalleled outdoor experience that combines adventure, exercise, and connection with nature. But finding the right mountain bike in today’s diverse marketplace can be as challenging as navigating a rocky singletrack for the first time.

Whether you’re a complete beginner looking to hit the trails for the first time or an experienced rider seeking to upgrade your trusty steed, this comprehensive guide will help you understand the different types of mountain bikes, key components to consider, and how to match a bike to your riding style and local terrain. Let’s dive into the exhilarating world of mountain biking!

Understanding Mountain Bike Categories

Mountain bikes have evolved into several specialized categories, each designed for specific terrain and riding styles. Understanding these categories is the first step in finding your perfect match:

Cross-Country (XC) Bikes

Designed for: Efficiency, climbing performance, and covering distance.

Typical features:

  • Lightweight frames (often carbon fiber)
  • Steeper head angles (67-70 degrees) for responsive handling
  • 100-120mm of suspension travel
  • 29″ wheels for rolling efficiency
  • Race-oriented geometry prioritizing pedaling position

Cross-country bikes excel on smoother trails, fire roads, and technical climbs. They’re perfect for riders who value speed and efficiency over downhill capability. Modern XC bikes are more capable on technical terrain than their predecessors but still prioritize lightweight construction and pedaling performance.

Trail Bikes

Designed for: Versatility across various terrain.

Typical features:

  • Balanced geometry for climbing and descending
  • 120-150mm of suspension travel
  • 29″ or 27.5″ wheels (or mixed wheel sizes)
  • Dropper seatposts as standard
  • More relaxed geometry than XC bikes but more efficient than enduro

Trail bikes are the do-it-all category, making them ideal for riders who encounter diverse terrain or aren’t specialized in one riding style. They strike the best balance between climbing ability and descending confidence, making them the most popular category for good reason.

All-Mountain/Enduro Bikes

Designed for: Technical descending while maintaining climbing ability.

Typical features:

  • Robust frames with reinforced construction
  • Slacker head angles (63-66 degrees) for stability at speed
  • 150-170mm of suspension travel
  • Focus on descending capability
  • Longer wheelbases for high-speed stability

Enduro bikes are designed for riders who prioritize downhill performance but still need to pedal to the top. They excel on technical, steep terrain and bike parks but can handle climbs when needed—though with more effort than lighter categories.

Downhill (DH) Bikes

Designed for: Maximum downhill performance on extreme terrain.

Typical features:

  • Extremely robust frames
  • 180-200mm of suspension travel
  • Dual-crown forks for maximum stiffness
  • Super slack geometry (62-64 degree head angles)
  • Optimized solely for descending, not climbing

Downhill bikes are specialized machines typically used at lift-served bike parks or shuttle-accessed trails. They’re not designed for pedaling uphill and excel exclusively at high-speed, technical downhill riding.

Fat Bikes

Designed for: Traction and flotation on challenging surfaces.

Typical features:

  • Ultra-wide tires (3.8″ to 5″+)
  • Wide rims and specialized frames to accommodate massive tires
  • Excellent traction on snow, sand, and loose terrain
  • Typically hardtail designs

Fat bikes excel in specific conditions like snow, sand, or extremely loose terrain where their oversized footprint provides unmatched traction and stability.

Frame Materials: Finding the Right Balance

The frame material significantly impacts a bike’s ride quality, durability, and price:

Aluminum

Pros:

  • Affordable
  • Relatively lightweight
  • Durable and impact-resistant
  • Low maintenance

Cons:

  • Can provide a stiffer, sometimes harsher ride
  • Slightly heavier than carbon

Aluminum remains the most common frame material for mountain bikes, offering excellent value and performance. Modern aluminum frames have improved significantly in ride quality and weight.

Carbon Fiber

Pros:

  • Extremely lightweight
  • Can be engineered for specific ride characteristics
  • Excellent vibration damping
  • Higher strength-to-weight ratio

Cons:

  • Expensive
  • Can be damaged in impacts
  • Repairs are specialized and costly

Carbon fiber dominates the high-end market due to its superior strength-to-weight ratio and the ability to fine-tune ride characteristics. The material allows engineers to create frames that are both lightweight and extremely strong in the directions that matter most.

Steel

Pros:

  • Comfortable, compliant ride
  • Extremely durable
  • Relatively easy to repair
  • Classic aesthetic

Cons:

  • Heavier than aluminum or carbon
  • Can rust if not properly maintained

Steel has made a comeback in boutique hardtails and certain specialty bikes where its unique ride characteristics and durability are valued over absolute weight savings.

Titanium

Pros:

  • Exceptional ride quality
  • Extremely durable
  • Corrosion-resistant
  • Lifetime durability

Cons:

  • Very expensive
  • Limited availability

Titanium represents the premium choice for riders seeking the ultimate combination of durability, ride quality, and performance—though at a significant price premium.

Suspension Explained: Finding Your Sweet Spot

Suspension transforms the mountain biking experience, allowing bikes to maintain traction and control over rough terrain while reducing rider fatigue:

Hardtail vs. Full Suspension

Hardtail bikes feature suspension in the front fork only, with a rigid rear end. Benefits include:

  • Lower cost
  • Less maintenance
  • Greater pedaling efficiency
  • Lighter weight
  • More direct power transfer

Full suspension bikes include both front fork and rear shock. Advantages include:

  • Superior comfort
  • Better traction on technical terrain
  • Reduced rider fatigue
  • Improved control on descents
  • Better performance on rough trails

For beginners or those riding primarily smoother trails and dirt roads, a quality hardtail offers excellent value. For riders tackling technical terrain regularly, full suspension provides significant performance benefits despite the higher cost and maintenance requirements.

Suspension Travel

The amount of suspension travel (the distance the wheels can move to absorb impacts) should match your typical riding terrain:

  • 80-120mm: XC and light trail riding
  • 120-140mm: General trail riding
  • 140-160mm: Aggressive trail and all-mountain
  • 160-180mm: Enduro and freeride
  • 180-200mm: Downhill

More travel isn’t always better—longer-travel bikes typically sacrifice climbing efficiency and agility for descending capability and comfort.

Wheel Sizes: The Great Debate

Mountain bikes come with three primary wheel size options, each with distinct characteristics:

29″ Wheels (29ers)

Pros:

  • Better rollover capability on obstacles
  • Improved momentum maintenance
  • Enhanced stability at speed
  • Superior traction due to larger contact patch

Cons:

  • Slightly slower acceleration
  • Can feel less nimble in tight terrain
  • Taller standover height

29ers have become the dominant wheel size across most categories due to their superior rollover ability and stability.

27.5″ Wheels (650b)

Pros:

  • More agile handling than 29″
  • Easier to maneuver in tight spaces
  • Quicker acceleration
  • Lower standover height benefits smaller riders

Cons:

  • Don’t roll over obstacles as easily as 29″
  • Less momentum on rough terrain

While less common than a few years ago, 27.5″ wheels remain popular for more playful riding styles and smaller riders.

Mixed Wheel Size (Mullet)

Some bikes now feature a 29″ front wheel paired with a 27.5″ rear wheel, combining the rollover benefits of the larger front wheel with the maneuverability and clearance advantages of the smaller rear wheel. This configuration has gained popularity in enduro and downhill applications.

Drivetrain Options: Simplicity vs. Range

Drivetrains have evolved dramatically in recent years, moving predominantly to single-chainring setups with wide-range cassettes:

1X Systems (Single Chainring)

Pros:

  • Simpler operation
  • Reduced maintenance
  • Fewer moving parts
  • Better chain retention
  • Cleaner cockpit with one shifter

Cons:

  • Potentially larger gaps between gears
  • Might not provide enough range for all terrain/fitness levels

Modern 1X systems with 10-52T cassettes offer sufficient range for most riders and have become the standard across nearly all mountain bike categories.

2X Systems (Double Chainring)

Pros:

  • Wider overall gear range
  • Smaller steps between gears
  • Better suited for varied terrain and touring

Cons:

  • More complex
  • Additional weight
  • More maintenance required

Double chainring setups have become rare on modern mountain bikes but can still be found on some entry-level and cross-country models.

Braking Systems: Stopping Power Matters

Nearly all quality mountain bikes now use disc brakes, but there are important differences between systems:

Hydraulic Disc Brakes

Pros:

  • Superior modulation (control over braking force)
  • More stopping power with less hand effort
  • Self-adjusting for pad wear
  • Better performance in wet conditions

Cons:

  • More complex to service
  • Higher cost

Hydraulic disc brakes are the standard for good reason—their performance advantages are substantial, particularly on technical terrain where precise control is critical.

Mechanical Disc Brakes

Pros:

  • Lower cost
  • Easier to field service
  • Simpler technology

Cons:

  • Less power and modulation
  • Require manual adjustment as pads wear
  • Heavier lever feel

Mechanical discs appear primarily on budget models and are functional but lack the performance of hydraulic systems.

Component Considerations: Where to Invest

When evaluating component specifications, prioritize these areas for the biggest performance impact:

Forks and Shocks

Suspension components have the largest impact on ride quality and control. Better suspension offers:

  • More sophisticated damping circuits
  • Greater adjustability
  • Lower weight
  • Improved sensitivity
  • Better performance under hard braking and cornering

Quality suspension is always worth the investment, as it directly affects confidence and capability on the trail.

Wheels

Wheel quality affects nearly every aspect of bike performance:

  • Lighter wheels accelerate faster
  • Stronger wheels withstand impacts better
  • Better hubs provide more reliable engagement
  • Higher quality wheelsets maintain proper tension longer

After suspension, wheels typically offer the most noticeable upgrade in performance.

Contact Points

The three areas where your body touches the bike significantly impact comfort and control:

  • Saddle: Must match your anatomy and riding style
  • Grips: Affect hand comfort and control
  • Pedals: Platform pedals for beginners/technical terrain, clipless for efficiency

These relatively inexpensive components can transform your riding experience and are often worth upgrading even on new bikes.

Bike Sizing and Fit: The Most Critical Factor

The perfect component specification means nothing if your bike doesn’t fit properly. Modern mountain bike sizing focuses on:

Reach

The horizontal distance from bottom bracket to head tube is now the primary sizing metric, determining how “roomy” the bike feels when standing/descending.

Stack

The vertical height from bottom bracket to top of head tube affects riding position and weight distribution.

Standover Height

Ensures you can safely dismount in an emergency, particularly important on steep terrain.

Seat Tube Angle

Steeper seat tubes (75-78°) place the rider in a better position for climbing and should be prioritized for hilly terrain.

Unlike road bikes, mountain bikes are typically sized by descriptive measurements (S, M, L, XL) rather than numerical frames sizes. Always consult manufacturer-specific sizing charts, as these designations aren’t standardized across brands.

Budget Considerations: Where to Save and Splurge

Mountain bikes range from around $500 to well over $10,000. What You Can Expect Across Different Price Ranges:

Entry-Level ($500-$1,000)

  • Aluminum hardtail frames
  • Basic coil-sprung suspension forks
  • Entry-level components
  • Mechanical disc brakes
  • Heavier overall weight

These bikes are suitable for casual trail riding on smoother terrain.

Mid-Range ($1,000-$2,500)

  • Higher quality aluminum frames
  • Entry-level full suspension or premium hardtails
  • Air-sprung forks with basic adjustments
  • Hydraulic disc brakes
  • 1X drivetrains with wide range
  • Tubeless-ready wheels

This range represents the sweet spot for recreational riders seeking reliability and performance.

Enthusiast ($2,500-$5,000)

  • Premium aluminum or entry-level carbon frames
  • Sophisticated suspension with multiple adjustments
  • Higher-grade drivetrain components
  • Stronger, lighter wheelsets
  • Dropper seatposts as standard
  • Performance-oriented geometry

Bikes in this category offer excellent long-term value for committed riders.

Premium ($5,000+)

  • Carbon fiber frames with sophisticated layups
  • Top-tier suspension components
  • Electronic shifting options
  • Carbon wheels on higher-end models
  • Premium finishing kit
  • Lightest overall weight

These bikes offer diminishing returns for casual riders but provide measurable performance benefits for dedicated enthusiasts.

Final Thoughts: Finding Your Perfect Match

The best mountain bike for you isn’t necessarily the most expensive or advanced—it’s the one that matches your:

  1. Local terrain: Consider the trails you’ll ride most frequently
  2. Riding style: Are you speed-focused or do you prefer technical challenges?
  3. Experience level: More forgiving bikes benefit beginners
  4. Physical condition: Fitness level affects gearing and suspension needs
  5. Long-term goals: Consider room to grow as your skills improve

Whenever possible, demo bikes before purchasing. Many bike shops and trail centers offer rental fleets that allow you to experience different models on actual trails—the best way to find your perfect match.

Remember that the best mountain bike is the one that gets ridden regularly. Focus on finding a bike that excites you to hit the trails, matches your local terrain, and fits your budget. With the right mountain bike as your trail companion, you’ll discover a world of adventure that combines physical challenge, technical skill development, and the simple joy of exploring the natural world on two wheels. Happy trails!

In a world increasingly dependent on electronic devices, staying powered up has never been more essential—whether you’re working remotely from a scenic location, camping in the wilderness, or preparing for unexpected power outages. Portable power stations have emerged as the versatile solution to this modern need, offering clean, quiet energy wherever life takes you.

These compact powerhouses have evolved dramatically in recent years, becoming more powerful, lighter, and smarter than ever before. But with hundreds of models flooding the market in 2025, how do you choose the right one for your specific needs? This comprehensive guide will walk you through everything you need to know to make an informed purchase decision.

What Exactly Is a Portable Power Station?

Unlike traditional gas generators, portable power stations are battery-powered devices that store electrical energy for use anywhere. They feature multiple output ports (AC outlets, USB, DC) to power or charge various devices and can be recharged via wall outlets, car chargers, or solar panels. Think of them as oversized power banks on steroids—capable of running everything from smartphones to refrigerators, depending on the model.

The beauty of these devices lies in their versatility and clean operation: no fumes, minimal noise, and zero direct emissions when in use. This makes them perfect for indoor and outdoor applications where traditional generators would be impractical or dangerous.

Key Factors to Consider While Choosing a Portable Power Station

1. Capacity: Understanding Battery Size

Capacity is measured in watt-hours (Wh), telling you how much energy the power station can store. This is perhaps the most crucial specification as it determines what you can power and for how long.

For context:

  • Small (100-300Wh): Perfect for charging phones (5-20+ times), tablets, cameras, and running small devices
  • Medium (300-700Wh): Suitable for running CPAP machines through the night, recharging laptops multiple times, and powering portable refrigerators for 5 to 10 hours.Large (700-1500Wh): Can handle power tools, mini refrigerators for 10-20+ hours, TVs, and multiple devices simultaneously
  • Extra Large (1500Wh+): Suitable for powering essential home circuits during outages, energy-intensive appliances, or multiple days of off-grid living

Keep in mind that the advertised battery capacity usually reflects the total capacity, but the actual usable power can be 10–15% lower due to energy conversion losses and system inefficiencies.

2. Output Power: How Much Can It Handle at Once?

While capacity tells you how long your devices can run, output power (measured in watts) tells you how many or how powerful those devices can be simultaneously. This is typically expressed as continuous output and peak output (surge):

  • Continuous output is what the power station can deliver steadily
  • Peak/surge output is the maximum it can deliver for a brief period (typically a few seconds) to accommodate the starting surge of devices like refrigerators or power tools

For example, a 500W power station might have a 1000W surge capability, allowing it to start devices that require high initial power before settling into lower operational power requirements.

Common continuous output ranges:

  • 200-500W: Good for electronics, lights, small appliances
  • 500-1000W: Handles most portable appliances and tools
  • 1000-2000W: Can power multiple appliances simultaneously
  • 2000W+: Approaches the capability of home backup systems

Always ensure your most power-hungry device’s requirements fall comfortably within the power station’s continuous output rating.

3. Battery Chemistry: The Foundation of Performance

The type of battery used dramatically impacts the power station’s performance, lifespan, and safety:

Lithium-ion (Li-ion): The most common chemistry, offering good energy density and moderate cycle life (500-800 full charge cycles). These represent the standard in mid-range units.

Lithium Iron Phosphate (LiFePO4): Increasingly popular for premium models due to significantly longer lifespan (2000-3500 cycles), better stability, and enhanced safety, though they’re typically heavier and more expensive.

Lithium NMC: Offers higher energy density than LiFePO4 but usually with fewer lifecycle ratings. Good for applications where weight and size are primary concerns.

The battery chemistry affects not just cycle life but also how the power station performs in extreme temperatures, its shelf life, and how it ages even when not in use.

4. Charging Options: Keeping Your Power Bank Powered

The versatility of recharging methods can make or break your experience with a portable power station:

AC Wall Charging: The standard method, with charging times varying from 2-8 hours depending on the model and its capacity.

Solar Charging: The game-changer for true off-grid use. Look for units with efficient MPPT (Maximum Power Point Tracking) charge controllers that optimize solar input. Note the maximum solar input wattage the unit can accept.

Car Charging: Usually via 12V car outlet, though slower than wall charging (typically 10-12 hours for full charge of medium units).

USB-C PD (Power Delivery): Newer models often feature fast charging input via USB-C, which can be convenient for topping up smaller units.

Many premium models now offer smart dual or triple input charging, allowing simultaneous charging from multiple sources (e.g., wall outlet + solar panels) to drastically reduce recharge times.

5. Output Ports: Connectivity for Your Devices

The variety and number of output ports determine what and how many devices you can power simultaneously:

AC Outlets: These standard household-style plugs are crucial for appliances and devices with regular power cords. Count and power rating matter.

USB Ports: Look for a mixture of USB-A and USB-C ports, preferably with fast-charging protocols (USB PD, QC 3.0) for modern devices.

DC Outputs: Including 12V car sockets and barrel ports for compatible devices.

Wireless Charging: Some models feature Qi wireless charging pads on top, convenient for smartphones.

RV/Anderson Ports: Higher-end models might include specialized connections for RV hookup or Anderson powerpole connectors for specific applications.

The ideal configuration depends entirely on your device ecosystem. Count your critical devices and their connector types before choosing.

Additional Features Worth Considering

Display Quality and Information

Basic models might show simple battery percentage, while advanced displays provide detailed information on:

  • Input/output wattage in real-time
  • Estimated hours remaining at current load
  • Individual port usage
  • Battery health metrics
  • Error codes and system status

App Connectivity

Smart power stations often connect to smartphone apps via Bluetooth or Wi-Fi, providing users with features such as:

  • Remote monitoring and control
  • Firmware updates
  • Customizable settings
  • Usage history and analysis
  • Power management features

Pass-Through Charging

This valuable feature allows the power station to simultaneously charge itself and power connected devices, effectively functioning as an uninterruptible power supply (UPS).

Weight and Portability

Consider the actual use case – will you be carrying this on hiking trips, or will it mostly stay in your vehicle or home? Weights can vary significantly—from as light as 3 pounds for compact handheld models to over 100 pounds for heavy-duty or home-based vacuum systems.

Noise Level

While much quieter than gas generators, cooling fans in power stations can still be noticeable during heavy use or charging. Premium models often feature intelligent temperature-controlled fans that operate only when necessary.

Expandability

Some newer models offer expansion battery packs that connect to the main unit, allowing you to scale up capacity when needed without replacing the entire system.

Use Cases and Sizing Recommendations

Emergency Home Backup

For powering essentials during outages:

  • Minimum recommendation: 1000Wh capacity, 1000W output
  • Ideal devices: Refrigerator, lights, communication devices, medical equipment
  • Key features: High capacity, multiple AC outlets, fast recharge capability

Remote Work

For the digital nomad powering a mobile office:

  • Minimum recommendation: 300Wh capacity, 300W output
  • Ideal devices: Laptop, phone, tablet, portable monitor, LED lighting
  • Key features: Multiple USB ports including USB-C PD, lightweight design

Camping/RV Use

For enhancing outdoor adventures:

  • Minimum recommendation: 500Wh capacity, 500W output
  • Ideal devices: Electric cooler, lighting, device charging, portable cooking equipment
  • Key features: Solar charging capability, durable construction, weather resistance

Outdoor Events

For powering gatherings away from electrical outlets:

  • Minimum recommendation: 700Wh capacity, 1000W output
  • Ideal devices: Speakers, lighting, projectors, small appliances
  • Key features: Higher peak power handling, multiple outlet types

Professional Use (Photography/Video/Field Work)

For creative professionals working off-grid:

  • Minimum recommendation: 500Wh capacity, 300W output
  • Ideal devices: Camera battery charging, drones, laptops, monitors, lights
  • Key features: Clean power output (pure sine wave), multiple charging options

Popular Brands in the Market

The portable power station market has matured significantly, with several manufacturers establishing strong reputations:

Established Leaders:

  • Brands like Jackery, Goal Zero, and EcoFlow have extensive product lines with proven track records
  • These typically offer better warranty support and reliability at a premium price

Value Brands:

  • Companies like Bluetti, Anker, and Rockpals offer competitive features at lower price points
  • Often provide excellent dollar-to-watt-hour value

Premium/Specialty Brands:

  • Brands like Lion Energy and Inergy focus on high-end specs and LiFePO4 batteries
  • These typically command higher prices but offer longer lifespans and specialized features

When considering brands, look beyond specifications to warranty terms, customer service reputation, and how long the company has been producing power stations.

Maintenance and Long-Term Care

To maximize the lifespan of your investment:

Storage Best Practices:

  • Keep your power station at 40-80% charge when stored long-term
  • Store in cool, dry environments (40-70°F ideal)
  • Recharge every 3-6 months when not in use

Temperature Considerations:

  • Most units operate optimally between 32-104°F (0-40°C)
  • Performance decreases significantly in extreme cold
  • Never charge lithium batteries when they’re below freezing

Cycle Optimization:

  • When possible, avoid frequently depleting the battery completely
  • For LiFePO4 batteries, occasional full discharges can help calibrate the battery management system

Making Your Final Decision

After narrowing down options based on technical specifications, consider these practical factors:

Real-World Testing: Look for reviews that conduct actual load testing rather than just repeating manufacturer specifications. Runtime under specific loads (like running a specific refrigerator model) provides more useful information than theoretical capacity.

Warranty and Support: The standard warranty period is typically 1-2 years, though premium brands may offer up to 5 years. Consider the company’s reputation for honoring warranties and providing firmware updates.

Future-Proofing: Consider how your power needs might evolve over the next 2-3 years. Sizing up slightly beyond your current requirements can be a wise investment.

Budget Allocation: Often, spending more initially on higher capacity and quality translates to better value over the product lifetime, especially considering battery degradation over time.

Conclusion: Powering Possibilities

A portable power station is more than an emergency backup—it’s a gateway to energy independence and on-the-go freedom. Whether you’re looking to work remotely from inspiring locations, enjoy extended time in nature without sacrificing conveniences, or simply gain peace of mind during power uncertainties, the right power station can transform your relationship with electricity.

By understanding the key specifications and features outlined in this guide, you’re now equipped to make an informed decision that aligns with your specific needs and budget. Remember that the best portable power station isn’t necessarily the most expensive or highest-capacity model—it’s the one that reliably powers your particular devices in the environments where you need them most. With technology advancing rapidly in this sector, 2025’s models offer unprecedented combinations of power, portability, and smart features. Your perfect portable power solution awaits—armed with this knowledge, you’re ready to make a choice that will keep you powered up for years to come.