Home Tips & Guide
Category:

Tips & Guide

24

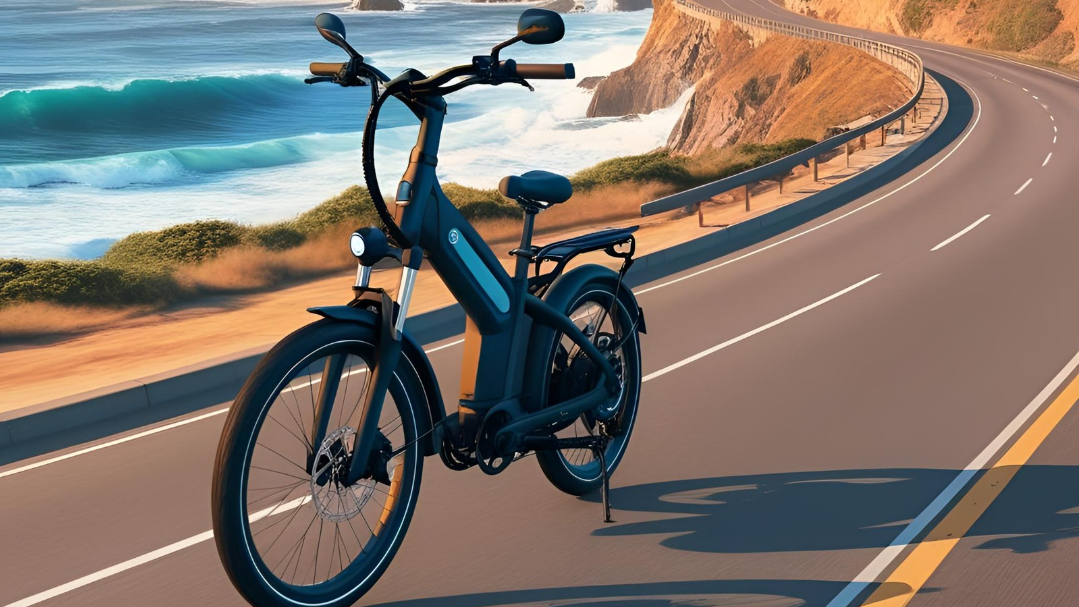
In a world where transportation options are evolving rapidly, electric bikes have emerged as a game-changing solution that combines the best of both worlds: the convenience of motorized travel with the health benefits of cycling. Whether you’re looking to beat traffic on your daily commute, reduce your carbon footprint, or simply enjoy the outdoors with less physical strain, an electric bike might be the perfect addition to your lifestyle.

But with hundreds of models flooding the market in 2025, finding the right e-bike can feel overwhelming. That’s why we’ve created this comprehensive guide to help you navigate the exciting world of electric bikes and make an informed decision that perfectly matches your needs, preferences, and budget.

Types of Electric Bikes: Finding Your Perfect Match

The first step in your e-bike journey is understanding the different types available, each designed for specific riding conditions and purposes:

Commuter E-Bikes

Designed for daily urban travel, these models prioritize reliability, comfort, and practicality. They typically feature fenders, lights, and racks for carrying bags or groceries. Commuter e-bikes strike a balance between speed and utility, making them perfect for navigating city streets and replacing car trips.

Mountain E-Bikes (eMTBs)

Built for off-road adventures, eMTBs feature robust frames, wider tires with aggressive tread patterns, and enhanced suspension systems. Their powerful motors help conquer steep terrain that might otherwise be inaccessible, extending your trail exploration capabilities significantly.

Folding E-Bikes

Perfect for multimodal commuters and those with limited storage space, folding e-bikes collapse into compact packages for easy carrying and storage. While they may sacrifice some performance and comfort compared to full-sized models, their convenience is unmatched for apartment dwellers or those who combine cycling with public transit.

Cargo E-Bikes

These workhorses are built to haul significant loads – whether that’s groceries, equipment, or even children. With extended frames and reinforced components, cargo e-bikes can replace car trips for many families, offering an eco-friendly alternative for running errands or school drop-offs.

Road E-Bikes

Sleek and lightweight, these models are built for speed and distance on paved surfaces. They typically feature thinner tires, drop handlebars, and a more aerodynamic riding position. The added electric assistance helps maintain higher speeds or tackle challenging hills without exhaustion.

Step-Through/Comfort E-Bikes

Featuring low, easy-to-mount frames and upright riding positions, these models prioritize accessibility and comfort over speed. They’re ideal for riders with mobility concerns or those who prefer a relaxed cycling experience.

Key Features to Consider When Purchasing an Electric Bike

Motor Types and Placement

The motor is the heart of any electric bike, and its type and placement significantly impact your riding experience:

Hub Motors are built directly into either the front or rear wheel. Rear hub motors offer better traction and a more natural feel, while front hub motors provide better balance on some frames. Hub motors are generally more affordable and require less maintenance, but they can make wheel removal more complicated for repairs.

Mid-Drive Motors are positioned at the bike’s center, usually near the pedals. This placement creates a more balanced weight distribution and natural riding feel. They’re more efficient on hills and varying terrain since they leverage the bike’s gears. However, they typically come at a premium price point and put more wear on the drivetrain components.

Battery Technology and Range

Battery specifications can be confusing, but understanding a few key metrics will help you compare options:

Battery capacity is usually measured in watt-hours (Wh), generally falling between 250Wh and 750Wh. A higher capacity provides extended usage time or range, but it also adds to the overall weight and cost of the device.

Range varies dramatically based on terrain, rider weight, assistance level, and even temperature. Most manufacturers provide estimates, but expect anywhere from 20-100 miles per charge depending on these factors. As a reference point, a 500Wh battery can typically deliver a range of 40 to 60 miles when used with moderate pedal assistance.

Charging Time typically ranges from 3-8 hours for a full charge. Some premium models offer fast-charging capabilities worth considering if quick turnaround is important to you.

Removable vs. Integrated batteries present a tradeoff between convenience and aesthetics. Removable batteries can be charged separately from the bike (ideal for apartment dwellers) but may create a less streamlined appearance.

Power Assistance Levels

Most e-bikes offer multiple assistance levels that determine how much the motor helps your pedaling:

  • Eco/Low: Extends battery life with minimal assistance
  • Tour/Normal: Balanced assistance for everyday riding
  • Sport/High: Strong assistance for hills or when you want to minimize effort
  • Turbo/Boost: Maximum power, but drains the battery quickly

Many bikes also include a walk-assist feature that provides gentle power when pushing the bike, which is helpful with heavier e-bikes.

Control Systems and Displays

The bike’s interface affects your riding experience significantly:

Display Types range from minimalist LED indicators to full-color screens with GPS functionality. More advanced displays show speed, distance, battery level, assistance level, and sometimes even fitness metrics or navigation.

Controls are typically handlebar-mounted and should be intuitive enough to operate while riding. Look for systems that don’t require taking your hands off the grips for basic functions.

Connectivity features are increasingly common, with many bikes offering smartphone apps for customization, diagnostics, and even anti-theft tracking.

Price Ranges: What to Expect at Different Price Points

Electric bikes span a wide price spectrum, with distinct differences at each tier:

Entry-Level ($1,000-$2,000)

  • Basic hub motors with moderate power
  • Smaller battery capacity (250-400Wh)
  • Heavier frames with standard components
  • Limited displays and features
  • Suitable for casual riders or those testing the waters

Mid-Range ($2,000-$4,000)

  • Higher quality motors with improved torque
  • Better battery range (400-600Wh)
  • Improved component quality and reduced weight
  • More refined control systems
  • The sweet spot for most regular riders

Premium ($4,000-$7,000+)

  • Top-tier motors with sophisticated power delivery
  • Maximum range batteries (600-750Wh+)
  • Lightweight materials and premium components
  • Advanced displays and connectivity
  • Specialized designs for specific uses
  • Professional-grade performance and durability

Remember that the most expensive option isn’t necessarily the best for your specific needs—focus on finding the right features for your riding style rather than simply maxing out your budget.

Safety Features to Prioritize

Safety should never be an afterthought, especially when dealing with motorized vehicles that can reach higher speeds:

Integrated Lighting has come a long way, with many e-bikes now featuring bright, battery-powered lights that run whenever the bike is on. Look for models with both front and rear lighting for maximum visibility.

Hydraulic Disc Brakes offer superior stopping power and are especially important for heavier e-bikes that reach higher speeds. They require less hand strength to operate effectively and perform better in wet conditions than mechanical disc or rim brakes.

Reflective Elements on tires, pedals, or frames provide additional visibility to motorists in low-light conditions.

Stability Features like wider tires or step-through frames can make mounting, dismounting, and handling the bike safer, especially for newer riders.

Legal Considerations: Know Before You Ride

Electric bike regulations vary significantly between regions, so research your local laws before purchasing. Common limitations include:

  • Maximum motor power (typically 750W in the US, 250W in Europe,)
  • Top assisted speed (usually 20mph in the US, 15.5mph in Europe)
  • Whether throttle operation is permitted (some regions require pedal assistance only)
  • Age restrictions for riders
  • Helmet requirements
  • Where e-bikes can legally operate (roads, bike paths, trails)

Violating these regulations could result in fines or even render your insurance invalid, so compliance is important.

Essential Accessories to Consider

Complete your e-bike setup with these practical additions:

Quality Lock System – E-bikes are valuable targets for theft, so invest in a robust lock system. Consider using multiple locks of different types for maximum security.

Helmet – With the increased speeds of e-bikes, head protection becomes even more critical. Look for well-ventilated models with MIPS technology for enhanced protection.

Cargo Solutions – Panniers, baskets, or rack trunks expand the utility of your e-bike, making it more practical for errands and commuting.

Fenders – Keep yourself clean and dry when riding in wet conditions.

Mirror – Enhance your awareness of traffic behind you without constantly turning your head.

Extra Charger – Having one for home and one for work can eliminate range anxiety for commuters.

Making Your Final Decision

After considering all these factors, make your selection process easier by:

  1. Test riding multiple models – The feel of different e-bikes varies dramatically, and there’s no substitute for first-hand experience.
  2. Prioritizing dealer support – Local service can be invaluable for maintenance and troubleshooting.
  3. Reading reviews from actual owners – Look beyond professional reviews to find real-world experiences with long-term reliability.
  4. Considering future needs – Will this bike still meet your requirements in 2-3 years as your riding habits evolve?
  5. Evaluating warranty coverage – Particularly for the motor and battery, which are the most expensive components to replace.

Conclusion: Your Electric Adventure Awaits

Investing in an electric bike isn’t just a purchase—it’s a lifestyle upgrade that can transform your daily transportation, fitness routine, and environmental impact. By carefully considering the factors outlined in this guide, you’ll be well-equipped to find an e-bike that delivers years of reliable, enjoyable riding.

Remember that the “perfect” electric bike is the one that gets ridden regularly. Focus on finding a model that excites you, fits your specific needs, and encourages you to choose two wheels over four whenever possible. With the right electric bike, you’ll discover a newfound freedom to explore your world in a way that’s both exhilarating and sustainable. Happy riding, and welcome to the electric revolution!

Whether you’re an experienced paddler or just starting your adventure on the water, choosing the best kayak can be a challenge. Kayaks come in different shapes, sizes, and materials, all designed for specific types of water, activities, and skill levels. In this ultimate guide, we’ll break down everything you need to know to pick the perfect kayak for your needs.

🛶 Types of Kayaks

Kayaks are designed for different purposes, and understanding the type that best fits your needs is the first step in making the right choice.

Recreational Kayaks

  • Best For: Calm lakes, slow-moving rivers, and beginners.
  • Features:
    • Wide, stable hulls for easy maneuvering.
    • Typically shorter (8-12 feet), making them more portable.
    • Comfortable seats with ample legroom for relaxed paddling.

Why Choose a Recreational Kayak?
They are perfect for casual paddling, sightseeing, and spending a few hours on calm water. They are stable and easy to control, making them ideal for beginners or anyone just looking to have fun on the water.

Touring or Sea Kayaks

  • Best For: Longer trips on open water, including lakes, rivers, and oceans.
  • Features:
    • Longer, sleeker design (12-18 feet).
    • Narrower hulls for faster speeds and better tracking in open water.
    • Typically come with dry storage compartments for longer journeys.

Why Choose a Touring Kayak?
If you’re looking to spend more time on the water or plan on taking longer trips, a touring kayak provides the comfort, speed, and storage you’ll need. They are more suited for intermediate and advanced paddlers due to their performance on open water.

Whitewater Kayaks

  • Best For: Fast-moving rivers with rapids (Class I-V).
  • Features:
    • Shorter (5-9 feet) for maneuverability in rough waters.
    • Strong and durable construction to withstand impacts.
    • Specialized hull shapes for maximum control and stability in whitewater.

Why Choose a Whitewater Kayak?
If you plan on tackling rivers with strong currents or rapids, these kayaks are built for high-performance and handling fast-moving water. These kayaks prioritize control over speed and are perfect for adventurous paddlers looking for excitement on the water.

Sit-On-Top Kayaks

  • Best For: Beginners, casual paddlers, and warm-water environments.
  • Features:
    • The paddler sits on top of the kayak, rather than inside it.
    • Easy to get on and off, ideal for recreational use and swimming.
    • Self-draining scupper holes to prevent water from collecting in the cockpit.

Why Choose a Sit-On-Top Kayak?
Sit-on-top kayaks are user-friendly, stable, and great for warm-weather paddling. They’re popular for activities like fishing, cruising around calm waters, or even lounging. Their open design makes them easier to get in and out of compared to traditional kayaks.

Fishing Kayaks

  • Best For: Anglers who want to fish from their kayak.
  • Features:
    • Larger and more stable than most kayaks.
    • Equipped with rod holders, storage compartments, and sometimes even live wells.
    • Can be sit-on-top or sit-in designs, depending on preference.

Why Choose a Fishing Kayak?
These kayaks are built with fishing in mind, offering extra stability to handle the motion of casting and reeling in fish. With specialized features like rod holders and ample storage space for gear, a fishing kayak enhances your experience and allows for hands-free fishing.

Inflatable Kayaks

  • Best For: Portability and convenience.
  • Features:
    • Can be deflated and packed into a small bag for easy storage and transportation.
    • Typically made from durable, puncture-resistant materials.
    • Ideal for calm waters and light touring, but not ideal for fast-moving rivers or rough seas.

Why Choose an Inflatable Kayak?
If space and storage are a concern, inflatable kayaks offer an easy solution. They’re lightweight, portable, and a great option for beginners or casual paddlers who don’t have the space to store a hard-shell kayak.

🏗️ Kayak Construction Materials

Kayaks are built from various materials, each with its own advantages and disadvantages. Here are the most common materials:

Polyethylene (Plastic)

  • Pros: Affordable, durable, and resistant to impacts.
  • Cons: Heavier than other materials, can degrade over time due to UV exposure.

Best For: Recreational and whitewater kayaks.

Fiberglass

  • Pros: Lightweight, fast, and durable.
  • Cons: More expensive than plastic, can be easily damaged if hit hard.

Best For: Touring kayaks and advanced paddlers.

Kevlar

  • Pros: Lightweight and extremely durable.
  • Cons: Very expensive and can be prone to scratching or denting in rocky conditions.

Best For: High-performance touring kayaks and racing.

Carbon Fiber

  • Pros: Very light and strong, making it excellent for speed.
  • Cons: Very expensive, fragile in certain conditions.

Best For: Competitive paddlers and racing kayaks.

Inflatable Materials (PVC, Nitrylon, etc.)

  • Pros: Lightweight, portable, and easy to store.
  • Cons: Less durable than hard-shell kayaks and not suited for rough waters.

Best For: Casual paddlers, traveling, and recreational use.

🚤 Size and Weight Considerations

Length of the Kayak

  • Shorter Kayaks (8-10 feet): More maneuverable but less fast. Great for recreational use, especially on small lakes or rivers.
  • Longer Kayaks (12-18 feet): Faster and better for straight-line tracking, perfect for touring and open-water conditions.

Weight of the Kayak

  • The weight of the kayak will impact how easy it is to transport. If you plan to carry it to the water frequently, consider a lighter kayak or an inflatable model.

🟡Why Comfort and Fit Matter

When you’re out on the water, especially for extended periods, comfort becomes one of the most important factors in your kayaking experience. An uncomfortable kayak can lead to back pain, sore muscles, or even blisters from ill-fitting footrests or paddles. Ensuring that the kayak fits your body type and provides sufficient support will make your time paddling far more enjoyable.

💡Key Considerations for Comfort and Fit

Seat Type and Padding

  • Padded Seats: Look for kayaks with well-padded seats that provide support for your lower back, as poor lumbar support can lead to discomfort over time. Many kayaks now come with adjustable seats that allow you to find a more personalized fit.
  • Seat Backrests: Some kayaks feature high-backrest seats, which are particularly important if you’re planning on long tours or paddling for hours. They offer extra lumbar support and comfort for your spine.
  • Cushioning: Paddling involves repetitive movement, so adequate cushioning on both the seat and backrest will help reduce strain. The more padding, the more comfortable your ride will be, especially for longer trips.

Legroom and Footrests

  • Adjustable Footrests: Adjustable footrests are essential for comfort because they allow you to find the right leg position for your body size. This helps to maintain proper posture while paddling, reduces strain on your legs, and gives you better control of the kayak.
  • Sufficient Legroom: Not all kayaks offer ample legroom, which is something to look for, especially if you’re tall. Kayaks that are too cramped can make long paddles uncomfortable and lead to muscle fatigue. Ensure the kayak has enough space to stretch your legs and adjust them as needed during your paddling session.

Cockpit Size and Design

  • Fit and Accessibility: The size of the kayak’s cockpit determines how easy it is to get in and out of the kayak. A tight cockpit may provide better stability, but can also be more difficult to enter or exit, while a larger cockpit may offer easier access but might compromise on stability.
  • Cockpit Adjustments: Some kayaks come with adjustable footrests, thigh braces, and backrests that you can fine-tune to your body size, allowing for a more personalized and comfortable paddling experience.

Padding and Anti-Slip Features

  • Anti-Slip Pads: Look for kayaks with anti-slip footrests or footpads. These will prevent your feet from slipping around while paddling, ensuring a stable and comfortable experience.
  • Knee and Thigh Padding: For added comfort, some high-end kayaks offer padding on the sides of the cockpit or thigh braces. This padding gives you a more comfortable contact with the kayak and helps secure your position for better control.

🏞️ Where Do You Plan to Paddle?

Where you plan to paddle your kayak plays a major role in determining which kayak is best for you. Different environments call for different design features, so it’s essential to consider the water conditions, the distance you’ll be traveling, and your level of experience.

Key Questions to Ask:

  • What type of water will you be paddling in?
  • What kind of distance are you planning to travel?
  • What’s your experience level?

Let’s explore the most common kayaking environments and what kind of kayaks perform best in each.

Flat Water (Lakes, Calm Rivers, Ponds)

    Best Kayaks: Recreational kayaks, sit-on-top kayaks, and touring kayaks are ideal for flat water conditions.

    Why: On calm waters, you don’t need a kayak that’s designed for speed or intense maneuvering. Recreational kayaks offer great stability and are easy to handle in these conditions. For longer excursions or if you want more speed, touring kayaks offer a faster, smoother ride, while sit-on-top kayaks are perfect for warmer conditions and easy access to the water.

Things to Consider:

  • If you’re only going out for a few hours on calm waters, a shorter kayak will be easy to maneuver and transport.
  • For longer paddles, consider a touring kayak with comfortable seating and storage.

Whitewater (Rivers with Rapids)

    Best Kayaks: Whitewater kayaks.

    Why: Whitewater kayaks are built for rapid, fast-moving rivers with obstacles like rocks, waves, and intense current. They are shorter and highly maneuverable, allowing you to navigate through narrow passages and handle fast-moving waters. They are made from durable materials to withstand the impacts of hitting rocks or other obstacles.

Things to Consider:

  • Choose a kayak with a low-profile design and quick turns to help you navigate through tight spots.
  • Whitewater kayaks are often more durable and rugged to handle rough waters.
  • Ensure your kayak has sufficient buoyancy to help keep you afloat in rapids.

Ocean/Saltwater Paddling

    Best Kayaks: Sea kayaks or touring kayaks.

    Why: Ocean kayaks are designed to handle rougher water conditions, including waves, tides, and wind. Sea kayaks are longer, with narrower hulls for speed and better tracking, making them ideal for open-water paddling and long-distance travel. They often come with watertight compartments to store gear safely and keep it dry.

Things to Consider:

  • For ocean kayaking, you need a kayak that’s fast and can handle rough waves without capsizing easily. Look for skeg or rudder systems that help with tracking.
  • Safety features like sealed hatches, good buoyancy, and self-bailing cockpits are crucial for open water conditions.
  • You’ll also need to consider storage space for gear, as longer expeditions may require extra equipment.

Multiday Trips and Touring

    Best Kayaks: Touring kayaks.

    Why: If you’re going on a long paddling expedition, you’ll need a kayak that’s built for comfort, stability, and long-distance paddling. Touring kayaks offer more storage space for overnight gear, including tents, food, and clothing. They are typically faster and more streamlined, so you can cover more distance per day.

Things to Consider:

  • Look for kayaks with hatches that seal well to keep water out and gear dry.
  • A spray skirt or deck cover can also help prevent water from entering the cockpit during rough conditions.
  • Comfortable seating is a must for long hours on the water, so look for kayaks with ergonomic designs.

Fishing

    Best Kayaks: Fishing kayaks (either sit-on-top or sit-in).

    Why: Fishing kayaks are built with extra stability and storage in mind. They often come with rod holders, gear racks, and additional compartments for carrying tackle, bait, and other fishing essentials. They are also wide and stable enough to allow you to move around while fishing without worrying about tipping.

Things to Consider:

  • If you’re fishing on calm lakes or bays, a sit-on-top kayak is perfect as it allows easy access to the water for casting or retrieving fish.
  • For saltwater fishing, make sure the kayak is corrosion-resistant and equipped with dry storage for valuable items.

Final Thoughts

Choosing the best kayak comes down to knowing how you plan to use it and what features matter most for your style of paddling. Whether you’re a beginner looking for a casual experience or an advanced paddler seeking performance, there’s a perfect kayak out there for you. By considering the type, material, and features that match your needs, you can confidently pick a kayak that will provide years of enjoyment and adventure on the water.

Whether you’re a casual user, a creative professional, or a hardcore gamer, the computer monitor you choose can dramatically affect your overall experience. It’s more than just a screen — it’s your window into the digital world. In 2025, the monitor market is booming with options tailored to different needs, from 4K ultrawide powerhouses to minimalist, energy-efficient displays.

This guide breaks down everything you need to know — from monitor types to must-have features — so you can choose the perfect one without getting lost in technical jargon.

🧩Types of Computer Monitors

1. LCD (Liquid Crystal Display)

Still the most common type, LCD monitors are affordable, energy-efficient, and ideal for everyday tasks like browsing, emails, and streaming.

2. LED (Light Emitting Diode)

A subtype of LCD, LED monitors use LED backlights for better brightness and contrast. They’re more power-efficient and generally slimmer.

3. OLED (Organic LED)

OLEDs offer stunning color accuracy, deep blacks, and lightning-fast response times. Perfect for designers, movie lovers, and gamers — but they come at a premium price.

4. Curved Monitors

Designed to wrap around your field of view, curved monitors provide a more immersive experience — great for gaming and multitasking.

5. Ultrawide Monitors

With a 21:9 aspect ratio, ultrawide monitors offer expansive screen real estate. Ideal for video editing, music production, and serious multitasking.

6. Touchscreen Monitors

Useful for kiosks, presentations, and creative work, touchscreen monitors bring smartphone-style interaction to your desktop.

Pro Buying Tips

Buying a computer monitor isn’t just about picking the one with the highest specs — it’s about finding the right match for your usage, workspace, and budget. Here’s a deeper dive into what you should keep in mind before making that purchase:

🎯 Define Your Primary Use Case

Start by asking: What will I use this monitor for most of the time?

Office Work & Productivity: Go for a monitor with at least Full HD (1080p) resolution, 60Hz refresh rate, and an IPS panel for comfortable viewing angles.

Graphic Design & Video Editing: Look for a high-resolution (1440p or 4K) IPS or OLED display with excellent color accuracy (99% sRGB or AdobeRGB).

Gaming: Prioritize high refresh rates (144Hz or more), low response time (1ms–5ms), and support for adaptive sync (FreeSync/G-Sync).

Media Consumption: A VA or OLED panel offers great contrast and rich visuals — ideal for watching movies and streaming.

Programming or Multitasking: Consider an ultrawide or dual monitor setup to keep more code or windows visible at once.

🪑 Ergonomics Matter More Than You Think

Long hours in front of a monitor can cause serious strain. Look for:

  • Height, tilt, and swivel adjustments
  • VESA mount compatibility (for arm mounts or wall installation)
  • Anti-glare coating to reduce reflections
  • Low blue light modes and flicker-free tech for eye comfort

Your neck, back, and eyes will thank you later.

🔌 Check the Ports Before You Purchase

Make sure your monitor supports the devices you use:

  • HDMI – Great for laptops, desktops, and gaming consoles
  • DisplayPort – Best for high-performance PCs and gaming setups
  • USB-C – Ideal for MacBooks and modern ultrabooks (bonus if it supports charging too)
  • Built-in USB Hubs – Handy for plugging in peripherals like keyboards and webcams

Pro Tip: Avoid adapters unless you absolutely have to — direct connections are more reliable.

🧰 Panel Type = Viewing Experience

Different panel types offer different strengths:

  • IPS – Best for color accuracy and wide viewing angles
  • VA – Strong contrast, deeper blacks (great for dark room viewing)
  • TN – Fast response times, but limited color and angle clarity (budget gaming option)

For professionals or creators, IPS is typically the best choice.

⚙️ Future-Proofing = Smart Spending

It’s tempting to buy the cheapest option now — but a well-chosen monitor can last 5–7 years or more.

Ask yourself:

  • Will I upgrade my GPU or system soon?
  • Do I need a monitor that supports 4K or USB-C?
  • Would a dual monitor setup make more sense later?

Spending a little more today can save you money (and frustration) in the long run.

💡 Always Read User Reviews (Not Just Specs)

Spec sheets are helpful, but real-world user feedback can reveal:

  • Build quality and durability
  • Backlight bleeding issues
  • Color uniformity problems
  • Software quirks with settings or compatibility

Look for patterns in reviews — one or two bad experiences is normal, but repeated complaints can be a red flag.

🧮 Budget Smartly — Know Where to Save & Splurge

  • Save on: Size (don’t go too big if you sit close), extra RGB lighting, built-in speakers (they’re usually bad).
  • Splurge on: Panel quality, resolution, and refresh rate if you’re gaming or doing creative work.

A quality monitor is an investment — and one you use every singleday.

🚫 Common Mistakes to Avoid When Buying a Computer Monitor

Even with all the right specs on paper, it’s easy to make the wrong choice if you’re not looking at the big picture. Here are some real-world mistakes people often make when buying a monitor — and how you can avoid them:

Overlooking Compatibility with Your System

A monitor is only as good as what your PC or laptop can handle.

  • Buying a 4K monitor when your graphics card can barely support 1080p? Waste of money.
  • Getting a 144Hz gaming monitor, but your system can only push 60 FPS? You won’t see the benefit.

Fix: Check your GPU output specs, supported resolutions, and refresh rates before buying. Make sure your ports (HDMI/DP/USB-C) match too.

Focusing Only on Size — Not Resolution

Bigger isn’t always better. A 32-inch monitor with 1080p resolution will look pixelated and blurry, especially for text and design work.

Fix: Pair size with resolution. For example:

  • 24″ = Full HD (1080p) is fine
  • 27″ = At least QHD (1440p)
  • 32″ or larger = Go for 4K (UHD)

Ignoring Ergonomics

That “cool-looking” fixed stand might be a pain if you’re stuck in one position all day. Poor ergonomics = neck strain, eye fatigue, and back problems.

Fix: Look for adjustable stands (height, tilt, swivel), or ensure it’s VESA mount compatible so you can use a monitor arm.

Getting a Gaming Monitor for Non-Gaming Use (or Vice Versa)

Gaming monitors often prioritize speed over color accuracy, while professional monitors focus on precise color but might lack high refresh rates.

Fix: Buy for your primary purpose.

  • For office: focus on eye comfort, IPS panel, and resolution.
  • For gaming: prioritize refresh rate, low response time, and G-Sync/FreeSync.

Not Considering Port Options

Buying a monitor with no DisplayPort or USB-C when your laptop depends on it? You’ll end up in adapter hell.

Fix: Check the input ports — and make sure they match your output device. Bonus: Look for monitors with extra USB ports to reduce cable clutter.

Falling for Gimmicks

Some monitors market features that sound cool but offer little real value:

  • Built-in speakers (usually weak)
  • RGB lighting (aesthetic but not essential)
  • “HDR support” (but only peak brightness of 250 nits)

Fix: Focus on performance and visual quality over gimmicky extras — unless you truly need or want those features.

Buying Without Checking Reviews or Warranty

That cheap monitor might look good on paper — until you realize it has major backlight bleed, poor build quality, or zero after-sale support.

Fix: Read real user reviews, expert feedback, and always check for at least a 1-year warranty or easy return policy.

Ignoring Eye-Care Features

If you’re working or gaming for hours, eye strain becomes a serious issue.

Fix: Look for features like:

  • Low blue light filters
  • Flicker-free technology
  • Anti-glare coating They really do make a difference in long-term comfort.

Not Planning for the Future

Maybe you only need one screen now — but will you want to go dual-screen later? Will your next laptop use USB-C?

Fix: Think a step ahead. Consider monitors with multiple input ports, slim bezels (for dual monitor setups), and future-proof connectivity like DisplayPort 1.4 or USB-C PD.

Final Thoughts

Choosing a monitor isn’t about picking the flashiest option — it’s about finding the one that suits your setup, budget, and daily needs. From fast refresh rates for gamers to ultra-clear 4K panels for content creators, the perfect monitor can elevate how you work, play, and create. Take your time, weigh the features that matter most, and you’ll end up with a display that’s not just good — but great for you.

Keeping your car clean isn’t just about looking good—it’s also about hygiene, maintenance, and value retention. One of the most effective tools for car cleanliness is the car vacuum cleaner. Whether you’re dealing with food crumbs, pet hair, or dust from daily use, a quality car vacuum can make a world of difference.

Here, we’ll explore what car vacuum cleaners are, their types, features to look for, and tips to choose the right one for your needs.

What Is a Car Vacuum Cleaner?

A car vacuum cleaner is a compact, portable device specifically engineered to clean the interior surfaces of vehicles. Unlike standard home vacuum cleaners, which are often bulky and designed for flat, open surfaces, car vacuums are tailored to tackle the unique challenges of automotive cleaning — such as tight spaces, irregular contours, textured surfaces, and a mix of both soft and hard materials.

These devices are designed to remove:

  • Dust and fine debris
  • Food crumbs and snack residue
  • Pet hair
  • Sand, mud, and dry leaves
  • Liquid spills (for wet/dry models)
  • Allergens and microscopic particles

How Are They Different from Regular Vacuums?

While household vacuum cleaners are effective for floors and carpets, they are often too large or inflexible to fit into the narrow spaces within a vehicle. Car vacuums, on the other hand, come with features that make them uniquely suited for automotive use:

  • Smaller form factor: Easy to carry and use inside cramped interiors
  • Targeted attachments: Designed to reach between seats, under pedals, and inside air vents
  • Power flexibility: Many can run on a 12V car power outlet or are battery-operated for maximum portability
  • Specialized filters: To handle fine dust and allergens common in car interiors
  • Durability: Built to handle outdoor debris like sand, grit, and gravel

Types of Car Vacuum Cleaners

Car vacuum cleaners come in different styles, each tailored to specific cleaning needs, vehicle sizes, and user preferences. Understanding the differences can help you make a better choice.

1. Corded Car Vacuums

These vacuums connect directly to a power source — either your car’s 12V cigarette lighter socket or a wall outlet (with an adapter). They typically deliver consistent and powerful suction without the worry of battery life.

Best for:

  • Deep cleaning sessions
  • Cars with heavy dirt, sand, or pet hair
  • Users who don’t mind managing a power cord

Pros:

  • Strong, stable suction
  • No need for recharging
  • Ideal for prolonged use

Cons:

  • Limited mobility due to cord length
  • May require an extension cord for garage or driveway use

2. Cordless (Battery-Powered) Car Vacuums

Cordless models are powered by rechargeable batteries and are designed for convenience and portability. They’re ideal for quick clean-ups or when you’re on the go.

Best for:

  • Small to mid-size vehicles
  • Frequent spot-cleaning
  • Travelers and road trippers

Pros:

  • Highly portable and easy to maneuver
  • No cords to manage
  • Lightweight design

Cons:

  • Limited runtime (typically 15–40 minutes)
  • Suction power may vary with battery level
  • Requires regular charging

3. Wet/Dry Car Vacuums

These versatile vacuums can handle both dry debris and liquid spills, making them perfect for families, pet owners, and anyone who frequently deals with accidental messes.

Best for:

  • Cleaning up wet spills (e.g., juice, melted snow)
  • Vehicles exposed to dirt, mud, or pets
  • Versatile usage beyond just the car

Pros:

  • Handles liquid and solid messes
  • Often comes with larger tanks
  • Durable and heavy-duty

Cons:

  • Usually larger in size
  • May be bulkier to store
  • Often more expensive

4. Handheld Car Vacuums

Designed for ease of use, handheld vacuums are compact, easy to store, and perfect for everyday maintenance. Available in both corded and cordless variants.

Best for:

  • Quick clean-ups
  • Cleaning tight areas like between seats or cup holders
  • Urban car owners with limited storage space

Pros:

  • Extremely portable
  • Simple to use and store
  • Great for light messes

Cons:

  • Smaller dustbin
  • Less powerful than full-sized options
  • Not ideal for deep cleaning

5. Shop Vacs with Car Attachments

Although not car-specific, wet/dry shop vacs with flexible hoses and fine attachments can be incredibly powerful for garage-based car detailing.

Best for:

  • Enthusiasts or DIY detailers
  • Garage use
  • Multiple purposes (e.g., home, workshop, car)

Pros:

  • Powerful suction
  • High capacity
  • Multi-use functionality

Cons:

  • Not very portable
  • Requires garage setup
  • Can be overkill for light cleaning

Benefits of Using a Car Vacuum Cleaner

1. Maintains Cleanliness and Hygiene

A car vacuum cleaner helps in keeping your vehicle consistently clean by removing visible dirt like crumbs, mud, and dust. More importantly, it tackles hidden contaminants such as bacteria, mold spores, and allergens that settle into seats and carpets. Regular cleaning ensures a more hygienic environment, especially vital for families with children or individuals with allergies.

2. Prevents the Build-Up of Odors

Leftover food, pet fur, damp clothes, and drink spills can all contribute to unpleasant smells over time. A vacuum cleaner with a strong suction and proper filtration can remove the underlying particles causing these odors before they settle in permanently.

3. Protects Interior Surfaces

Dust and debris can act like sandpaper on your car’s upholstery and dashboard, causing gradual wear and tear. By vacuuming regularly, you protect fabric, leather, and plastic components from premature aging, fading, and deterioration.

4. Saves Time and Money

Instead of making frequent visits to car wash services or paying for deep cleaning, a car vacuum allows you to handle basic maintenance at home. Over time, this can significantly cut down on detailing costs, especially for drivers who prioritize a clean interior.

5. Improves Air Quality Inside the Vehicle

HEPA or high-efficiency filters can trap ultra-fine dust, pollen, and allergens, which are especially beneficial for those with respiratory conditions like asthma. A cleaner interior means cleaner air to breathe during every ride.

6. Enhances Resale Value

A well-maintained interior can significantly improve the resale or trade-in value of your car. Potential buyers are more likely to pay a premium for a vehicle that looks, feels, and smells fresh—signaling proper upkeep and attention to detail.

Tips for Choosing the Right Car Vacuum Cleaner

1. Assess Your Cleaning Needs

Start by identifying how often and how intensely you plan to clean. If your car rarely gets dirty, a basic model may suffice. But if you have children, pets, or frequently transport items like gardening supplies, you’ll want a vacuum with high suction power and specialized attachments.

2. Choose Between Corded vs. Cordless

  • Corded Vacuums usually offer better suction power and unlimited runtime, ideal for thorough cleaning sessions.
  • Cordless Models offer greater convenience and mobility but require charging and have limited operation time (usually 15–30 minutes). Go for lithium-ion batteries for better performance and longevity.

3. Consider Vehicle Size

Owners of large SUVs or minivans may benefit from vacuums with long hoses, extension tools, and higher dust capacity. Compact cars, on the other hand, can be cleaned effectively with smaller handheld models.

4. Check the Filtration System

A high-quality filter, such as a HEPA filter, captures allergens and tiny particles—making it ideal for people with allergies or respiratory issues. Washable and reusable filters are also cost-effective in the long run.

5. Evaluate Accessories and Attachments

The right set of tools can significantly enhance your cleaning efficiency:

  • Crevice Tool – for tight corners and between seats
  • Brush Attachment – great for fabric and carpets
  • Flexible Hose – helps reach under the seats
  • Extension Wand – useful for larger interiors

6. Noise Levels Matter

Look for vacuums that operate quietly, especially if you plan to clean regularly. Most models list decibel (dB) ratings—anything under 70 dB is considered relatively quiet.

7. Portability and Storage

A compact, lightweight design with an ergonomic handle will make cleaning less tiring and more efficient. Some vacuums also come with carrying bags or wall mounts for easy storage.

8. Battery Life and Charging Time (Cordless Only)

Ensure the model offers at least 20–30 minutes of runtime if you’re cleaning a full car. Fast-charging options and replaceable batteries are a bonus for long-term use.

9. Check the Build Quality

A sturdy vacuum with solid plastic casing, quality seals, and durable buttons will last longer and perform better under regular use.

10. Read Reviews and Compare Brands

Before making a purchase, check user reviews, ratings, and comparison videos. Look for consistent feedback on suction power, reliability, and customer service.

Final Thoughts

A car vacuum cleaner is a practical investment for anyone who spends a lot of time on the road or simply wants to maintain their vehicle in top shape. With various options available, finding one that fits your budget and lifestyle is easier than ever. Prioritize power, portability, and filtration to ensure a cleaner and healthier driving experience.

Older Posts